Five Gallon Bucket Garden Stand: 15 Creative DIY Ideas to Elevate Your Gardening Game
If you’ve ever stared at a plain five-gallon bucket and wondered, “Can this really grow something besides water?” you’re not alone. I’ve spent countless weekends experimenting with bucket gardens, and let me tell you: they are a game-changer. Not only are they inexpensive, but when paired with a sturdy stand, they instantly become portable, ergonomic, and surprisingly chic additions to any patio, balcony, or backyard.
A five-gallon bucket garden stand takes your container gardening to the next level, offering better drainage, easier access, and a visual lift that makes your plants feel more like décor than a gardening chore. Plus, it’s fun. You get to play with height, angles, and layering without spending a fortune on fancy pots or raised beds.
Over the next 15 ideas, I’ll walk you through ways to turn these humble buckets into stylish, functional, and thriving mini-gardens that even your neighbors might envy. And the best part? I’ll show you exactly how to build each stand yourself.
1. Tiered Bucket Herb Garden
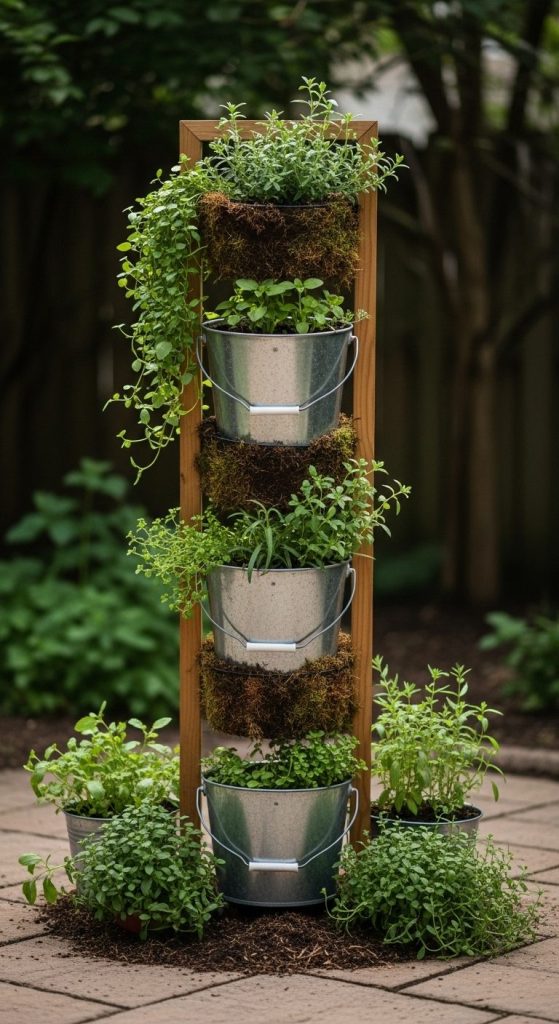
Ever wished your favorite herbs were right at arm’s reach when cooking? A tiered stand lets you stack 3–4 five-gallon buckets vertically, giving each plant its own sunlight while saving floor space.
Pros:
- Maximizes small spaces.
- Creates a visually dynamic garden feature.
- Easier access without bending over.
Cons:
- Requires a sturdy stand to support multiple buckets.
- Watering can be tricky; top buckets may need more frequent care.
Takeaway: Tiered stands turn tiny patios into lush herb towers, perfect for chefs at heart.
How to Build It:
- Gather 3–4 five-gallon buckets, wood planks, and screws.
- Build a vertical frame using 2x4s, creating shelves at different heights.
- Drill drainage holes in each bucket.
- Place buckets on shelves and secure with screws or brackets for stability.
2. Wheel-Based Mobile Bucket Garden
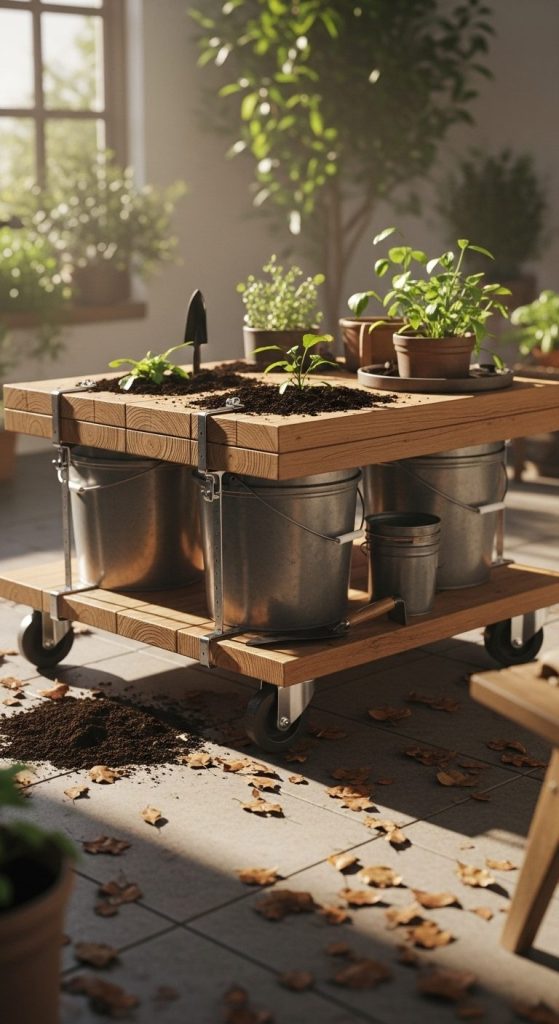
Imagine rolling your garden to chase the sun or move indoors during a storm. Adding wheels to a bucket stand makes your plants fully mobile.
Pros:
- Flexibility to relocate plants easily.
- Protects plants from extreme weather.
- Reduces strain when moving heavy, soil-filled buckets.
Cons:
- Wheels can be unstable on uneven surfaces.
- Needs locking mechanism to prevent rolling in wind.
Takeaway: Mobility means your garden goes wherever you go—perfect for urban gardeners with unpredictable weather.
How to Build It:
- Attach a sturdy wooden platform to caster wheels.
- Securely place your five-gallon buckets on the platform.
- Use brackets or straps to prevent tipping.
- Add wheel locks to stabilize the stand when stationary.
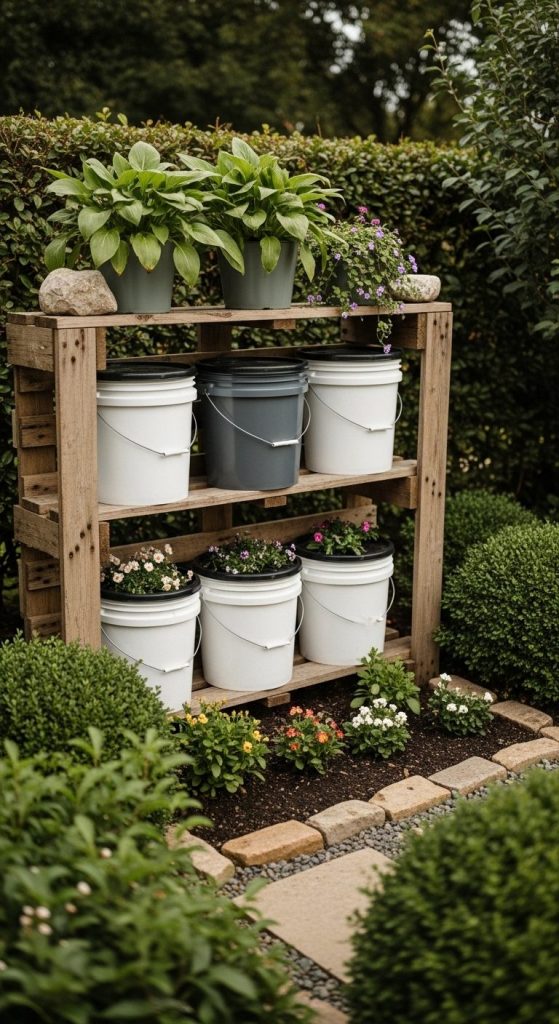
3. Recycled Wood Bucket Stand
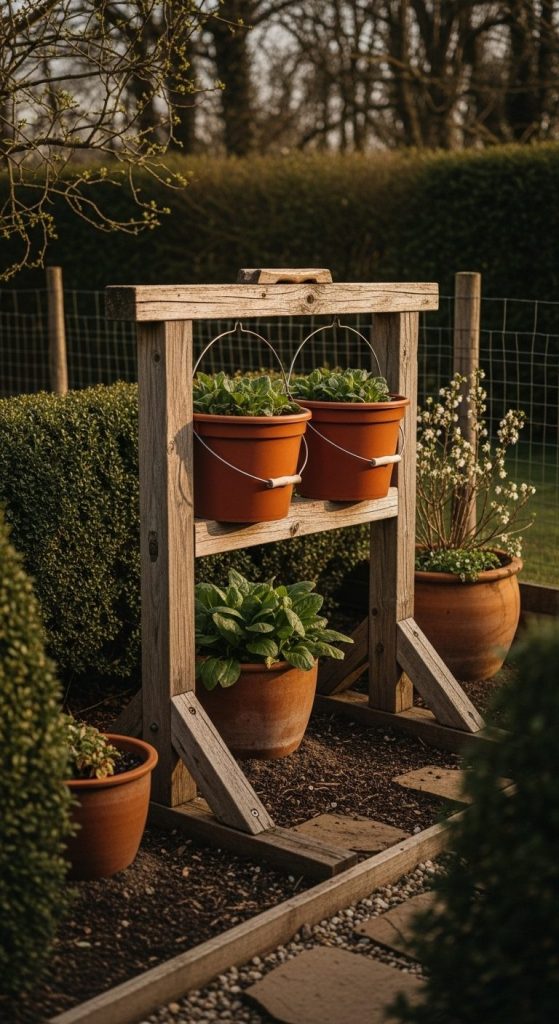
Building a stand from reclaimed wood not only looks rustic but also supports eco-friendly gardening. Perfect for a cottage-style patio.
Pros:
- Stylish, natural aesthetic.
- Customizable heights and bucket spacing.
- Budget-friendly if using recycled materials.
Cons:
- Wood may need sealing to prevent rot.
- DIY construction requires some tools and skills.
Takeaway: Rustic charm meets functionality—your garden becomes a sustainable statement piece.
How to Build It:
- Collect pallet wood or old planks.
- Cut planks to create a frame that holds 2–3 buckets.
- Assemble the frame using screws and brackets.
- Seal the wood with outdoor varnish to prevent water damage.
4. Stacked Succulent Buckets
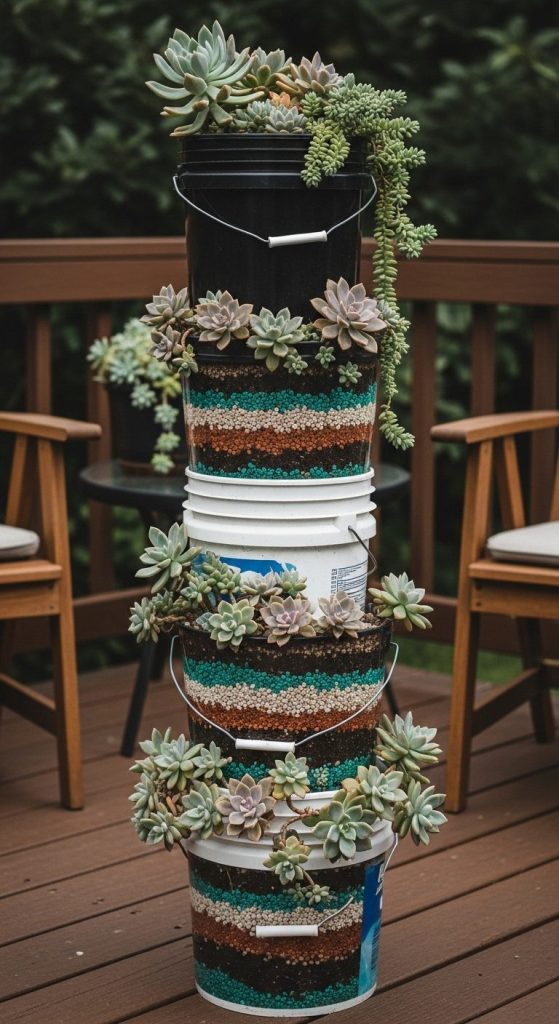
Succulents thrive in shallow soil and bright light, making them perfect candidates for stacked bucket gardens on compact stands.
Pros:
- Low maintenance and drought-tolerant.
- Perfect for decorative focal points.
- Combines multiple colors and textures easily.
Cons:
- Limited water retention in small bucket depths.
- Overcrowding can stunt growth.
Takeaway: A succulent tower is a low-effort, high-impact statement for your balcony or deck.
How to Build It:
- Stack 2–3 buckets on top of each other using a vertical frame or risers.
- Drill drainage holes in each bucket.
- Fill with succulent soil and plants.
- Stabilize with screws or zip ties to prevent tipping.
5. Vertical Flower Display
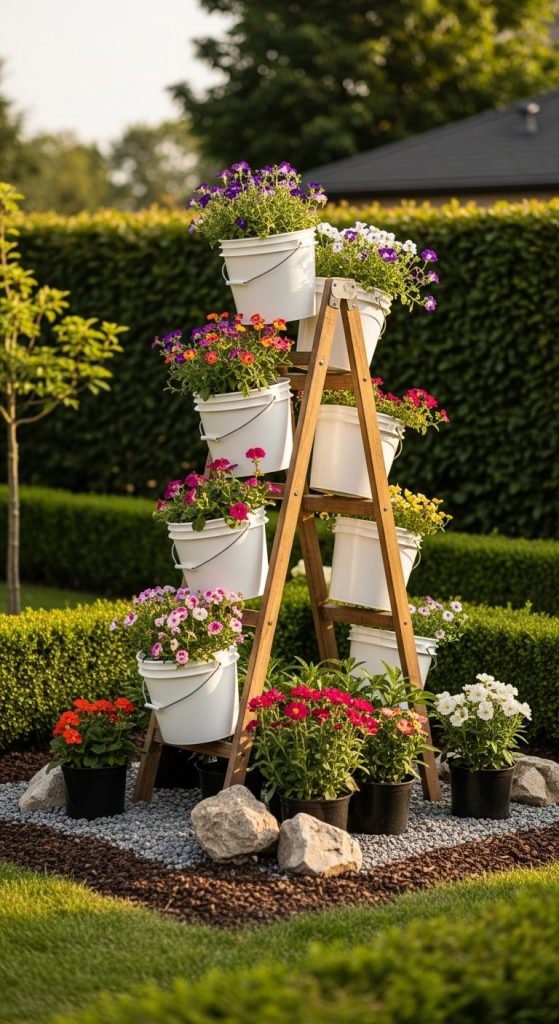
Brighten a dull corner with a vertical bucket garden featuring flowers of varying heights. The stand elevates blooms for maximum visual appeal.
Pros:
- Enhances curb appeal instantly.
- Easy to switch flowers seasonally.
- Keeps blooms off the ground, away from pests.
Cons:
- Top buckets can dry out faster.
- Requires strategic sunlight planning.
Takeaway: Vertical stands make your flowers the star of the show, even in a small garden.
How to Build It:
- Build a simple ladder-style wooden frame.
- Place buckets at each rung, ensuring each has drainage.
- Plant flowers according to sunlight needs.
- Secure buckets with straps or hooks.
6. Raised Vegetable Buckets
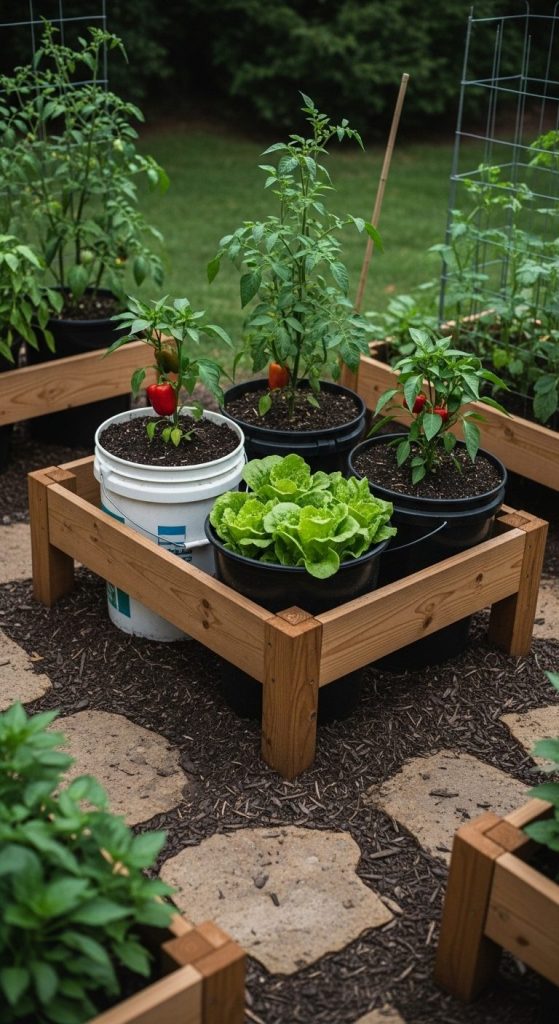
A stand elevates five-gallon buckets for vegetables like tomatoes, peppers, and lettuces, reducing the need to bend over while harvesting.
Pros:
- Improves accessibility and ergonomics.
- Enhances drainage and airflow.
- Makes pest control easier.
Cons:
- Heavy when filled with soil and water.
- Stand must be extremely sturdy to prevent tipping.
Takeaway: Raised veggie buckets combine comfort with practicality, perfect for avid home growers.
How to Build It:
- Use a rectangular wooden frame that elevates buckets 12–18 inches.
- Drill bucket drainage holes.
- Secure each bucket in the frame with metal straps.
- Optionally, paint or seal the wood for durability.
7. Hanging Bucket Stand
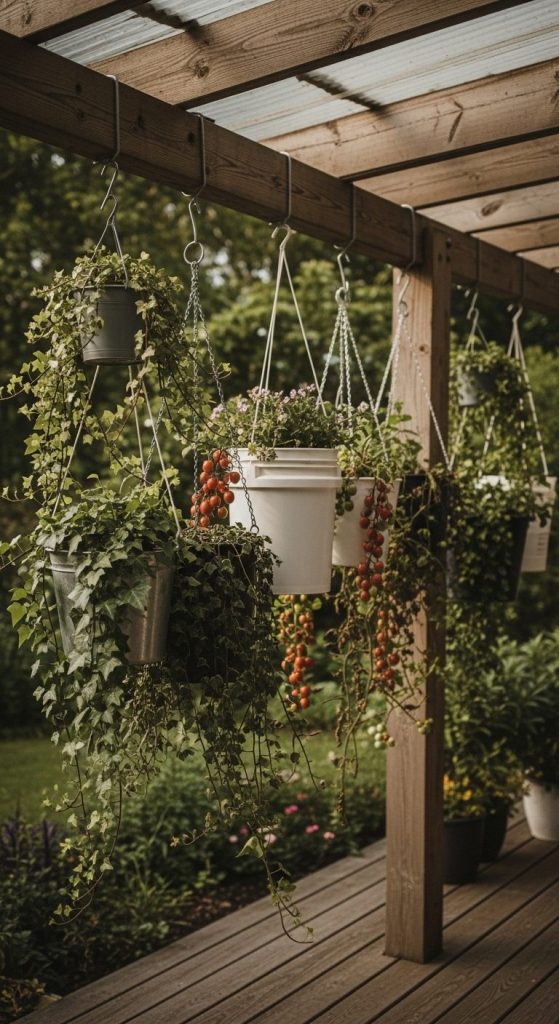
For decks with overhead beams, consider a hanging stand that suspends buckets at varying heights. Great for trailing plants like ivy or cherry tomatoes.
Pros:
- Saves ground space entirely.
- Adds vertical dimension to your garden.
- Easy to rotate plants for sunlight exposure.
Cons:
- Requires secure anchoring.
- Limited weight capacity.
Takeaway: Floating buckets bring life to underutilized vertical spaces.
How to Build It:
- Attach sturdy hooks or brackets to a ceiling beam.
- Hang buckets using chains or ropes.
- Drill drainage holes.
- Plant trailing or light plants for best effect.
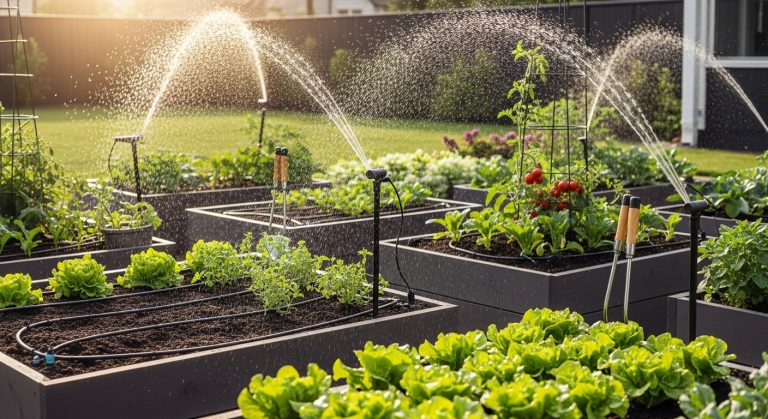
8. Multi-Bucket Irrigation System
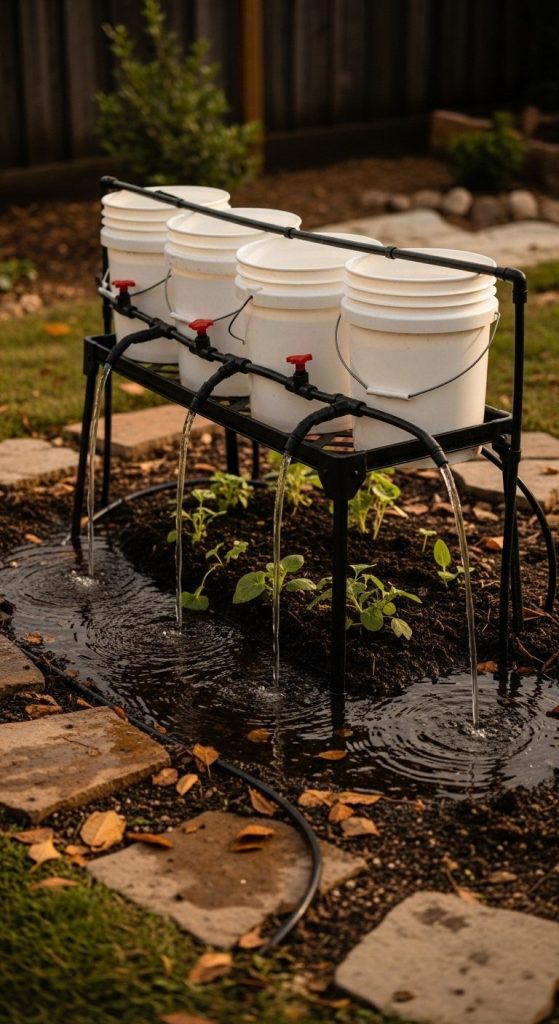
Connect a stand with multiple buckets using a DIY drip irrigation setup. Keeps soil consistently moist with minimal effort.
Pros:
- Automates watering, saving time.
- Reduces water waste.
- Ideal for busy gardeners or hot climates.
Cons:
- Initial setup can be complex.
- Drip emitters may clog if not maintained.
Takeaway: Efficient and eco-friendly watering makes bucket gardening worry-free.
How to Build It:
- Drill small holes at the bottom of each bucket.
- Connect a drip irrigation tube to each bucket using connectors.
- Position the buckets on a raised stand.
- Adjust drip flow for even watering.
9. Convertible Indoor/Outdoor Stand

A lightweight stand allows you to bring your bucket garden inside during winter or harsh weather, then move it outdoors in summer.
Pros:
- Extends growing season.
- Protects delicate plants from frost.
- Keeps garden dynamic and flexible.
Cons:
- Limited space indoors for multiple buckets.
- Indoor lighting may need supplements for sun-loving plants.
Takeaway: Portability ensures your garden thrives year-round without compromise.
How to Build It:
- Use a lightweight wood or metal frame with handles.
- Ensure each bucket has drainage and a saucer to prevent mess indoors.
- Keep the stand compact for easy indoor placement.
10. Artistic Painted Bucket Stand
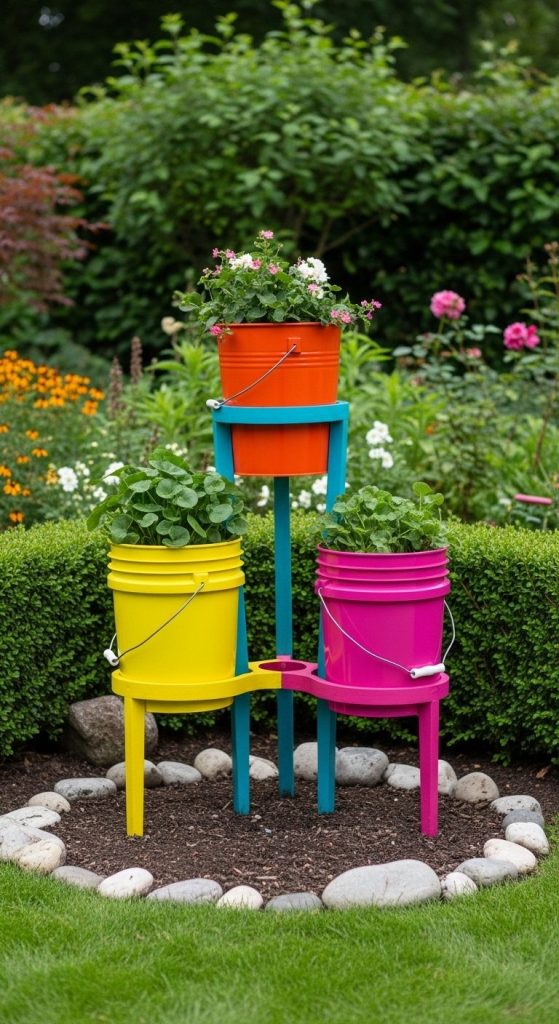
Add a pop of color by painting the stand and buckets in complementary hues. Turn functional gardening into a creative expression.
Pros:
- Enhances aesthetic appeal.
- Protects buckets from UV damage.
- Allows seasonal or thematic changes.
Cons:
- Paint may fade outdoors over time.
- Extra prep time required for DIY projects.
Takeaway: Personalizing your stand elevates gardening into a visual art form.
How to Build It:
- Assemble a standard wooden or metal stand.
- Sand and prime the surfaces.
- Paint buckets and stand with weather-resistant paint.
- Seal with clear varnish for longevity.
11. Corner Bucket Garden Stand
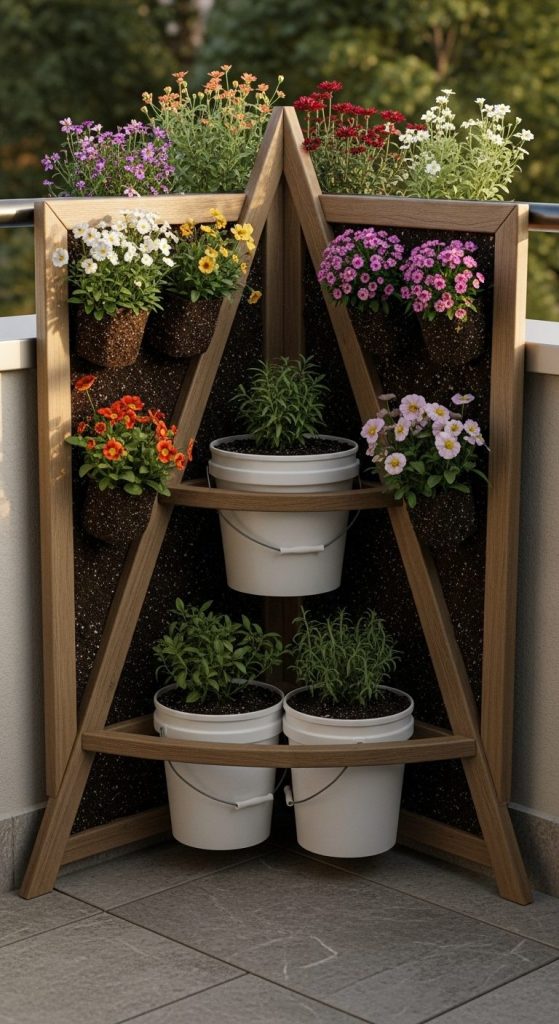
Make the most of awkward corners by designing a triangular or L-shaped stand that fits snugly. Perfect for balconies and patios.
Pros:
- Optimizes underused spaces.
- Keeps pathways clear.
- Multi-tiered designs maximize yield.
Cons:
- Irregular shapes may require custom builds.
- Harder to water or harvest evenly.
Takeaway: Clever corner solutions mean no space goes to waste in your garden.
How to Build It:
- Measure your corner space carefully.
- Build a triangular wooden frame to hold 2–3 buckets.
- Drill drainage holes in buckets.
- Secure buckets with straps or small brackets.
12. Outdoor Entertainment Bucket Garden
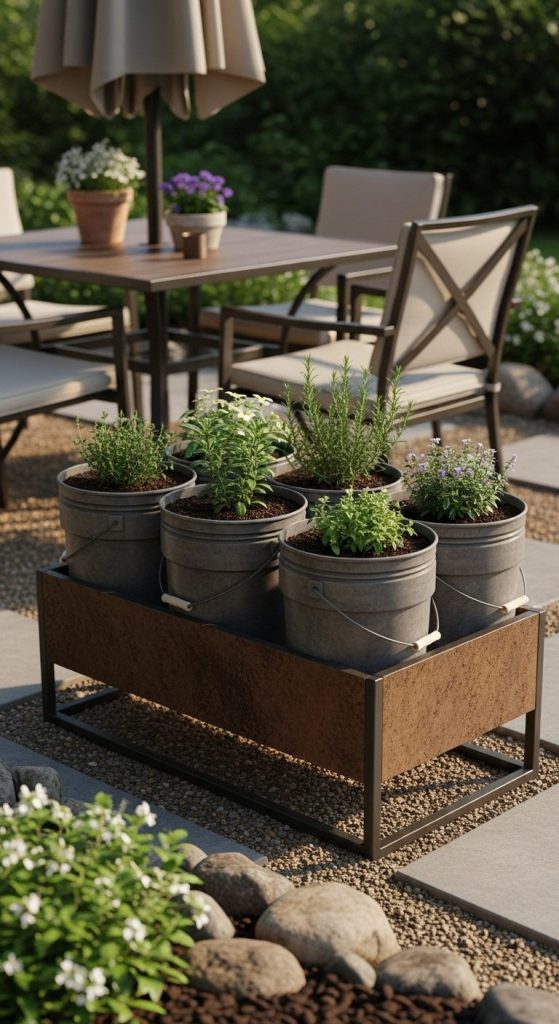
Integrate a bucket stand into your patio setup with herbs, flowers, or small veggies for instant garden dining experience.
Pros:
- Fresh ingredients at arm’s reach.
- Encourages outdoor dining and entertainment.
- Functional and decorative simultaneously.
Cons:
- Can get in the way of seating if not planned well.
- Needs maintenance to keep plants tidy and attractive.
Takeaway: Functional beauty turns your garden into an interactive experience.
How to Build It:
- Build a rectangular stand that fits beside seating areas.
- Place 2–4 buckets on the stand.
- Plant herbs or flowers for both aesthetics and function.
- Secure buckets to prevent accidental tipping.
13. DIY Rustic Pallet Stand for Buckets
Use old pallets to create a rustic stand that holds multiple buckets. Great for DIY enthusiasts and upcycling fans.
Pros:
- Eco-friendly and cost-effective.
- Customizable height and spacing.
- Adds rustic charm to any garden.
Cons:
- Needs sanding and sealing to prevent splinters.
- Heavy when supporting multiple buckets.
Takeaway: Pallet stands prove that creativity can turn scraps into a functional garden centerpiece.
How to Build It:
- Cut pallets to size.
- Assemble shelves using screws or nails.
- Sand and seal wood.
- Place buckets securely on each shelf.
14. Solar-Powered Bucket Garden Stand
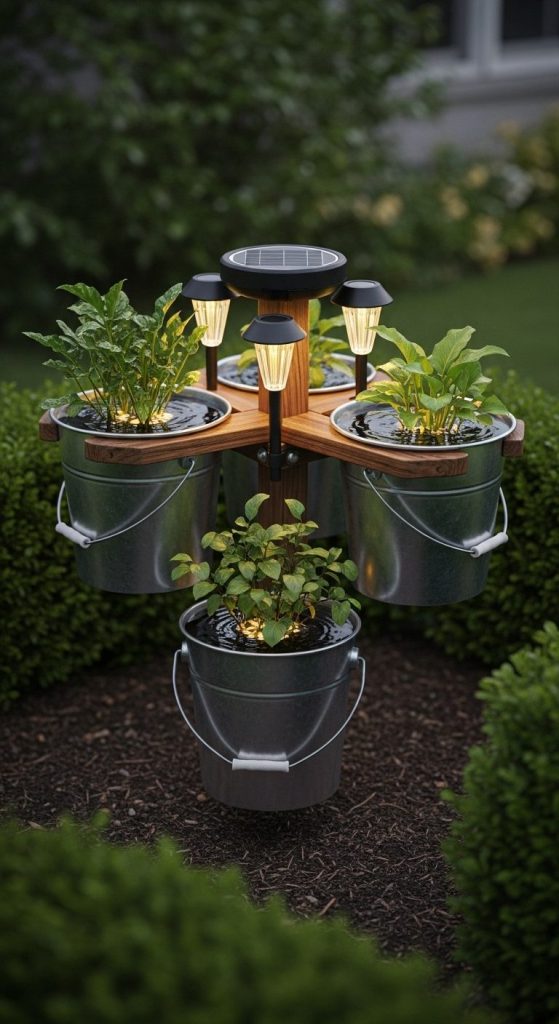
Integrate small solar lights into the stand to illuminate plants at night. Functional and magical.
Pros:
- Adds ambiance to outdoor spaces.
- Encourages evening use of garden areas.
- Eco-friendly and self-sufficient.
Cons:
- Solar panels require direct sunlight.
- Initial setup cost slightly higher.
Takeaway: Lighting makes your bucket garden shine, literally, after sunset.
How to Build It:
- Build a standard wooden or metal stand.
- Drill small holes or attach clips for solar lights.
- Insert buckets with plants.
- Ensure solar panels get sunlight exposure.
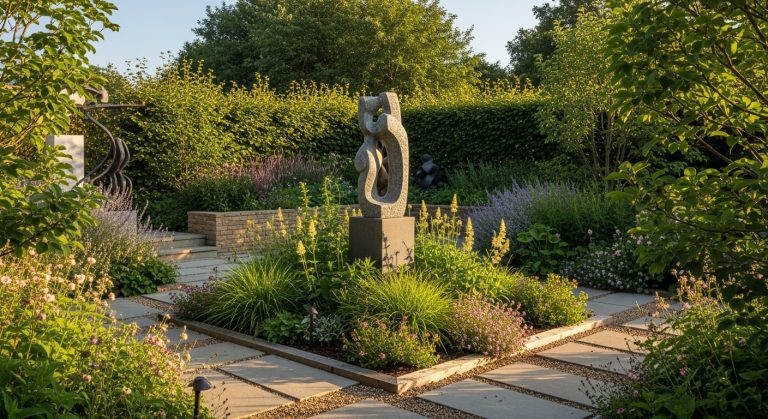
15. Multi-Level Foliage Showcase
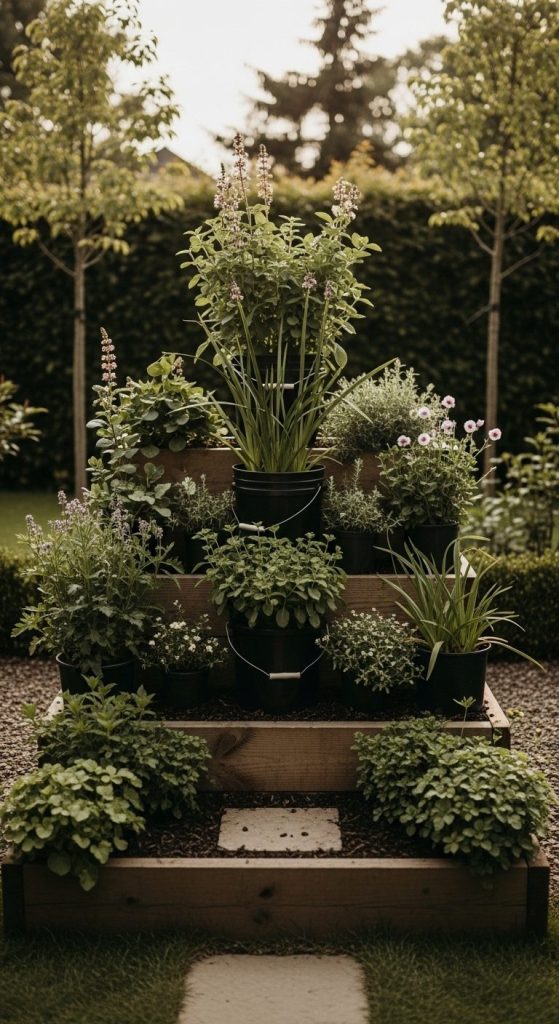
A stand with staggered bucket heights allows for varied plant types—tall, medium, and ground-covering—creating a lush, layered look.
Pros:
- Maximizes visual interest.
- Improves airflow and sunlight access.
- Highlights plant diversity beautifully.
Cons:
- More complex to assemble.
- Requires careful planning for weight distribution.
Takeaway: Layered stands turn a simple bucket garden into a mini botanical showcase.
How to Build It:
- Build a stepped wooden frame with three different heights.
- Drill drainage holes in each bucket.
- Place buckets on each level.
- Plant a mix of tall, medium, and trailing plants for visual layering.
Conclusion
A five gallon bucket garden stand is more than just a practical solution—it’s a canvas for creativity, efficiency, and style. From tiered herb towers to solar-powered artistic displays, these stands help you elevate your plants while keeping gardening accessible and fun.
Whether you’re limited on space, working with a tight budget, or just love the satisfaction of DIY, a bucket stand can transform how you grow, display, and enjoy your plants. A little imagination, some sturdy materials, and your favorite buckets are all it takes to make a garden that’s functional, beautiful, and totally unique.

Ashley Ellison is a skilled writer and avid bowler. Her passion for storytelling and dedication to the sport have led her to participate in various national bowling leagues. With a unique combination of talents, Ashley approaches every challenge with creativity and a relentless drive to succeed.