15 Landscaping Limelight Hydrangea Ideas That Actually Work (No Fluff)
You know that feeling when you see a house with those massive, creamy-green hydrangeas that slowly turn pinkish as summer rolls on? And you think, “I want that, but where do I even start?” That’s exactly where I found myself three summers ago.
Limelight hydrangeas are having a major moment in landscaping right now. Not the old-school blue ones that demand constant babying. These panicle hydrangeas are the overachievers of the shrub world—tough, drought-tolerant once established, and they bloom like clockwork even if you forget to prune them.
But here’s the thing. Just planting one in the middle of your lawn? That’s not the move. I’ve learned through trial, error, and a few expensive mistakes that how you position and pair your Limelights changes everything. So let me walk you through fifteen real-world ways to make these shrubs the star of your yard without turning your weekend into a construction project.
1. Anchor Your Driveway with a Symmetrical Pair
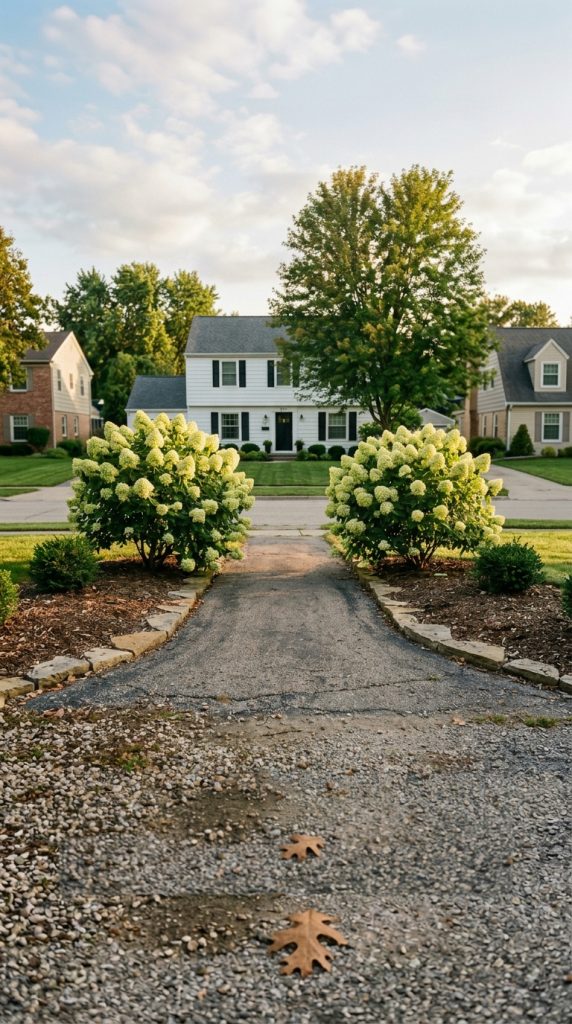
My neighbor did this last spring, and honestly, I’m still a little jealous every time I pull into my own driveway. She planted two Limelight hydrangeas on either side of her driveway entrance, about eight feet back from the road. Nothing fancy—just two evenly spaced shrubs that frame the view as you approach the house.
The magic happens because Limelights naturally grow into that perfect rounded shape without looking like meatballs. They soften the hard lines of pavement and gravel, and those cone-shaped blooms catch the afternoon sun in a way that makes you slow down on purpose.
Pros
- Creates instant curb appeal that real estate agents actually notice
- Low maintenance once established—no shearing into boxes required
- Blooms from July through September, so you’re not stuck with green blobs all season
Cons
- You need enough width on both sides of your driveway (at least four feet from pavement to house)
- Fall cleanup means deadheading those dried blooms if you care about tidy winter looks
Don’t overthink spacing here. Give each shrub about five feet of personal space. They’ll grow into each other slightly, which is actually what you want for that full, lush look. Measure twice, dig once, and remember you’re playing the long game.
2. Create a Living Privacy Screen Along Your Patio
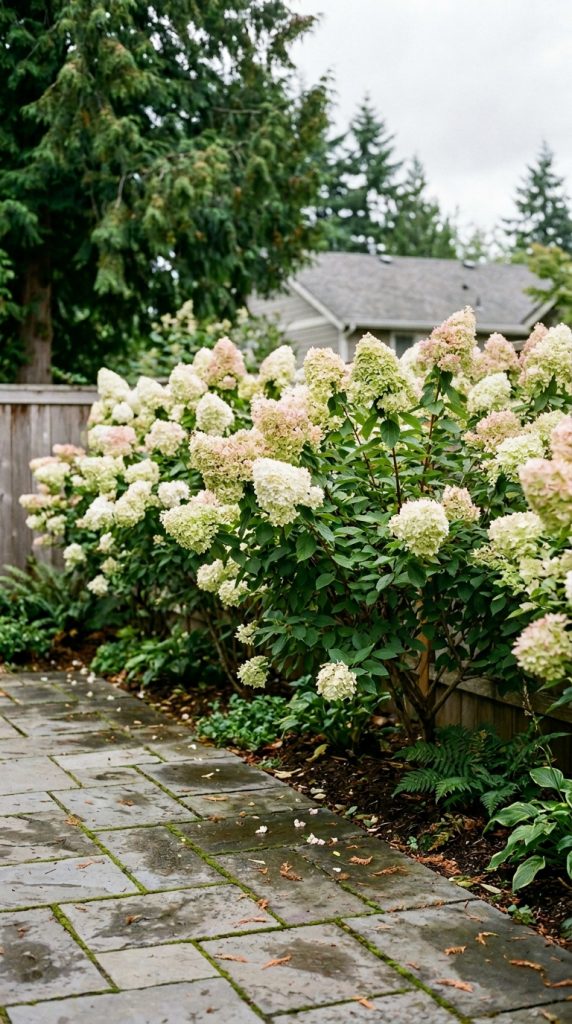
Here’s something I wish someone had told me years ago. A fence is boring. A row of arborvitaes is overdone. But a staggered row of Limelight hydrangeas along your patio edge? That’s smart landscaping.
They top out around six to eight feet tall, which is perfect for blocking your neighbor’s second-story window view without making your yard feel like a fortress. And because they lose their leaves in winter, you still get winter light when you want it most.
Pros
- Dense branching from ground level means no awkward bare legs
- Blooms at eye level when you’re sitting on your patio—gorgeous detail you actually see
- Much faster growing than boxwoods or yews (two to three years for full effect)
Cons
- Winter dieback in harsh climates might leave gaps until late spring
- You’ll need five to seven plants for an average patio, which adds up cost-wise
Space them four feet apart center to center. Any closer and they’ll compete. Any farther and you’ll see gaps. And here’s a pro tip I learned the hard way—plant them two feet away from your patio edge so the branches don’t smack you in the face when you’re grilling.
3. Frame a Front Window Without Blocking the View
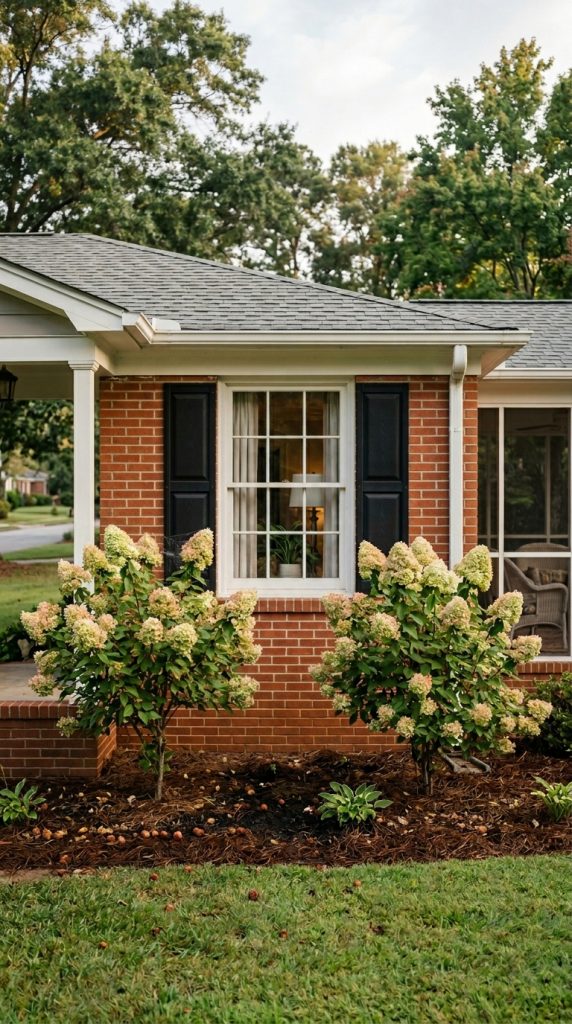
You’ve seen those houses where someone planted a shrub directly under a window, and now they’re fighting a losing battle with pruners every June. Don’t be that person.
Limelights planted on either side of a front window—about three feet away from the foundation and four feet apart from each other—create this beautiful natural frame. The window stays functional. The view stays clear. But the house feels softer, more welcoming, like it belongs in the landscape instead of just sitting on top of it.
Pros
- Draws the eye to your home’s best architectural features
- Blooms sit right at window level for indoor-outdoor enjoyment
- Much more interesting than the standard boxwood foundation planting
Cons
- You’ll need to prune annually to keep them from creeping toward the glass
- South-facing windows in hot climates might stress the plants without afternoon shade
Pick a spot where the mature width (about five feet) won’t overlap your window by more than six inches on each side. And if you’ve got a big picture window? Use three plants—one centered, two flanking. Trust me on this.
4. Line a Long Walkway for a Grand Entrance

My aunt has a hundred-foot gravel walkway from her driveway to her front door. It used to feel like a death march. Now she’s got Limelight hydrangeas alternating on both sides every six feet, and suddenly the walk feels intentional. Inviting. Like you’re approaching something special instead of just walking to a door.
The key here is scale. Smaller shrubs would get lost. Trees would overwhelm. Limelights hit that sweet spot where they feel substantial without swallowing the path.
Pros
- Creates rhythm and repetition that’s visually pleasing from every angle
- The blooms change color as you walk the same path throughout summer
- Excellent way to disguise a boring straight walkway that lacks character
Cons
- You’ll need a lot of plants for a long walkway (budget accordingly)
- Snow removal becomes trickier if you live where plows run close to paths
Stagger them rather than planting directly opposite each other. It creates a zigzag visual path that makes the walk feel shorter and more interesting. And leave three feet of clearance from the walkway edge—those branches spread more than you think.
5. Build a Summer-Focused Foundation Border
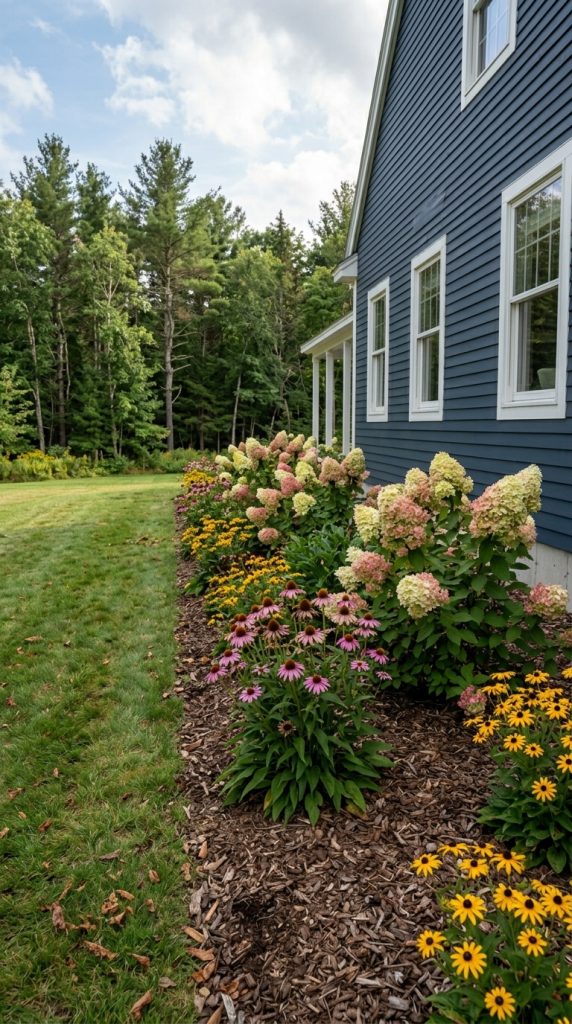
Here’s the problem with most foundation plantings. They look great in spring, okay in summer, and boring by August. Limelights flip that script completely.
Use them as the anchor plants along your house foundation, but space them farther apart than you think—about six to eight feet. Then fill the gaps with lower-growing perennials that bloom earlier. Your Limelights will hit their stride right when everything else starts looking tired, carrying your curb appeal straight through September.
Pros
- Extends your home’s attractive season by a solid two months
- The light-colored blooms pop against dark siding or brick
- No need for constant deadheading like with annuals
Cons
- Winter appearance is just bare branches (plan evergreen companions nearby)
- Roots need room away from foundation—at least three feet from the wall
Mix in some dwarf evergreens or ornamental grasses near the Limelights so your foundation doesn’t look completely dead from November to March. And point a downspout away from them—they like consistent moisture but not constant sogginess against your house.
6. Plant a Circle Around a Mature Tree
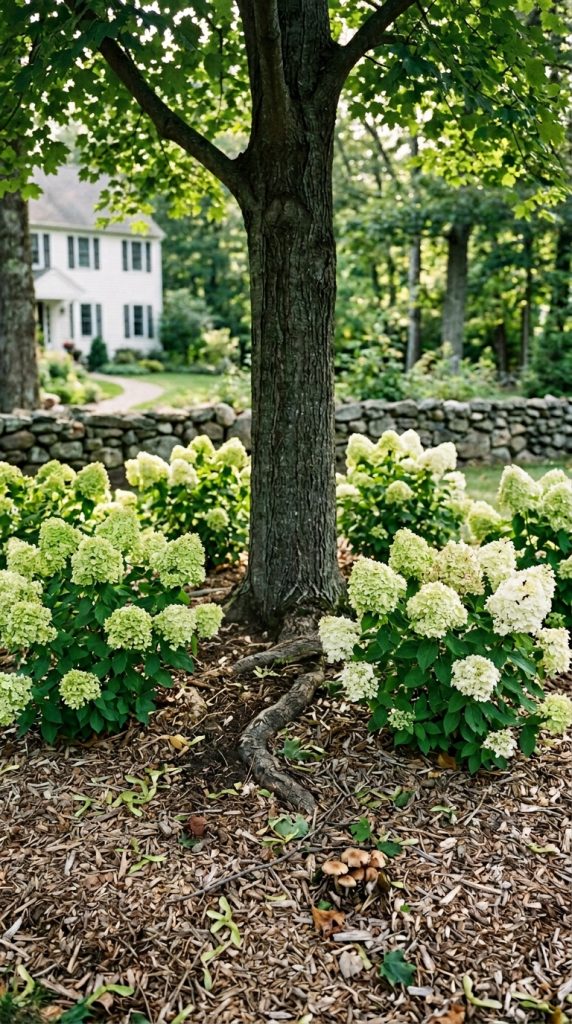
This one surprised me. I didn’t think Limelights would play nice with tree roots, but they’re surprisingly adaptable. Plant five or six of them in a loose ring around a large shade tree, about six feet out from the trunk.
The tree provides dappled shade, which Limelights actually prefer in hot climates. And the hydrangeas fill that awkward bare zone under the tree where grass refuses to grow anyway. It’s like they were made for each other.
Pros
- Solves the “nothing grows under my tree” problem elegantly
- Creates a destination in your yard that feels intentional, not accidental
- The tree gives winter interest while hydrangeas are dormant
Cons
- Digging around established tree roots is hard work and risks damaging the tree
- You’ll need to water more frequently since tree roots compete aggressively
Don’t dig individual holes. Use a shovel to slice through smaller roots and create one continuous trench. And choose a tree with high enough branches that you’re not hitting your head on limbs when you walk through.
7. Edge a Driveway on a Sloped Property
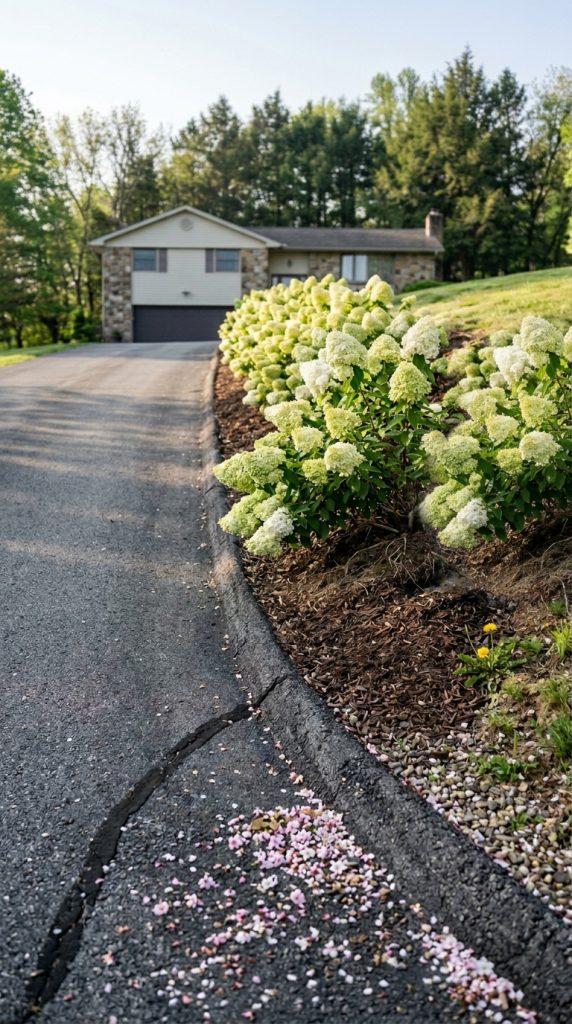
Slopes are tricky. Grass is a nightmare to mow. Groundcovers take forever to establish. But a row of Limelight hydrangeas planted along the high side of a sloping driveway? That’s working with your terrain instead of fighting it.
The plants help hold soil with their root systems, reducing erosion. Their height balances the visual weight of a slope that might otherwise feel like it’s sliding into your driveway. And those blooms hang down slightly, softening the sharp edge where lawn meets pavement.
Pros
- Reduces muddy runoff onto your driveway during heavy rain
- Creates a natural guardrail effect that improves safety
- Much less maintenance than trying to keep grass alive on a slope
Cons
- Planting on a slope is physically harder (kneeling at weird angles)
- Water runs off faster, so you’ll need to water more often the first year
Terrace the slope slightly where each plant goes. Create a small flat pocket so water actually soaks in instead of running past. And use a thick layer of wood chip mulch to hold everything in place during establishment.
8. Create a Four-Season Corner Anchor
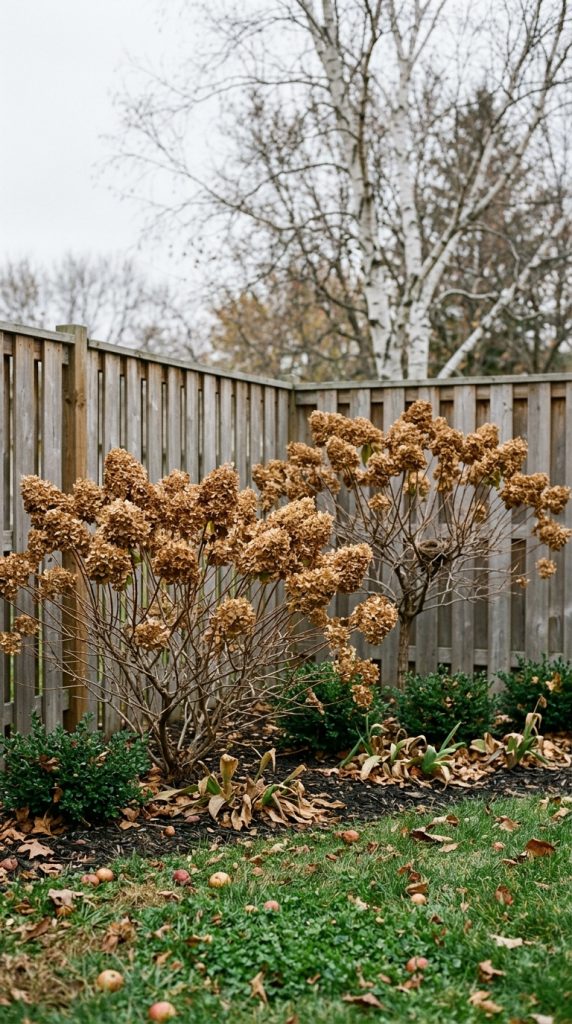
Every yard has that corner. The one by the mailbox. The far edge of the fence. The spot where two property lines meet. Most people stick a random shrub there and call it done.
Here’s a better move. Plant a pair of Limelights in that corner—one slightly behind the other for depth. Then underplant with low evergreens and spring bulbs. You’ve got early color from bulbs, green structure from evergreens, summer into fall blooms from the Limelights, and then dried flower heads that catch frost and snow all winter.
Pros
- Gives you something interesting to look at in every single season
- Makes your property feel larger by drawing the eye outward
- Dried winter blooms are genuinely beautiful with snow on them
Cons
- Takes a couple years to fill in and look intentional instead of scattered
- Corner spots often get forgotten during watering routines (set a reminder)
Stake the location before you plant and walk to your house from the street. Make sure the corner reads clearly from your main viewing angle. If it doesn’t, shift the whole planting until it does.
9. Underplant with White Perennials for a Monochromatic Look
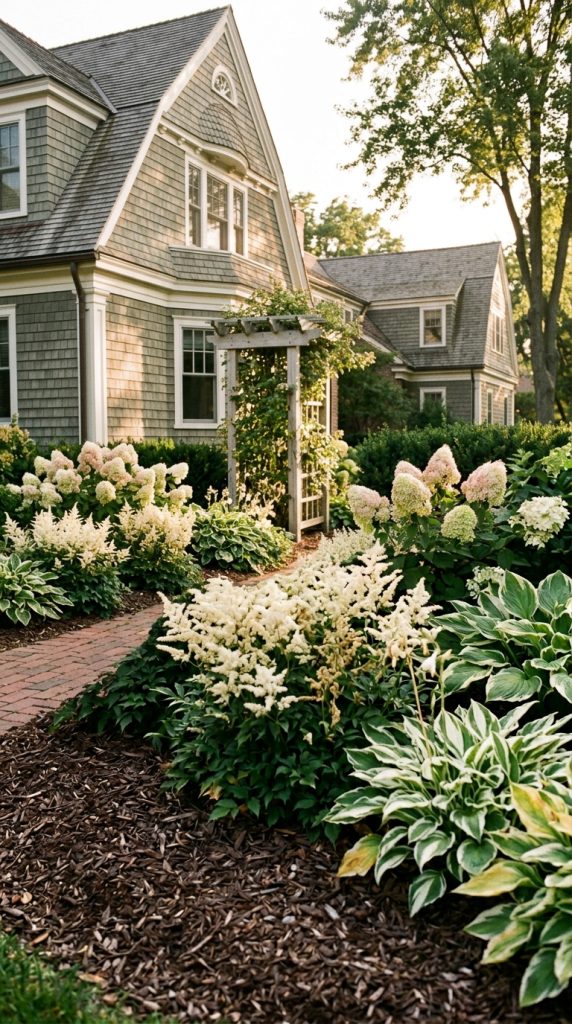
I’m normally a color-maximalist. Give me all the purples and oranges and hot pinks. But I saw this combination at a botanical garden and had to copy it.
Plant white flowering perennials in front of your Limelights. White astilbe. White hostas. White sedum. The Limelights themselves start creamy-green and fade through chartreuse to white-pink. Everything reads as one harmonious, peaceful mass of light tones. It’s incredibly chic in a way that feels accidental but absolutely isn’t.
Pros
- Glows in evening light like nothing else in your garden
- Feels sophisticated without being fussy or high-maintenance
- White flowers hide dying foliage better than bright colors
Cons
- Can look washed out if you don’t have enough contrast from hardscape or evergreens
- Some white perennials bloom earlier, leaving gaps before Limelights peak
Use at least three of the same white perennial repeated along the planting. One here, one there looks like a mistake. Repetition looks like a plan. And throw in one small Japanese maple with dark leaves for contrast—trust me on this.
10. Plant a Single Specimen in a High-Visibility Lawn
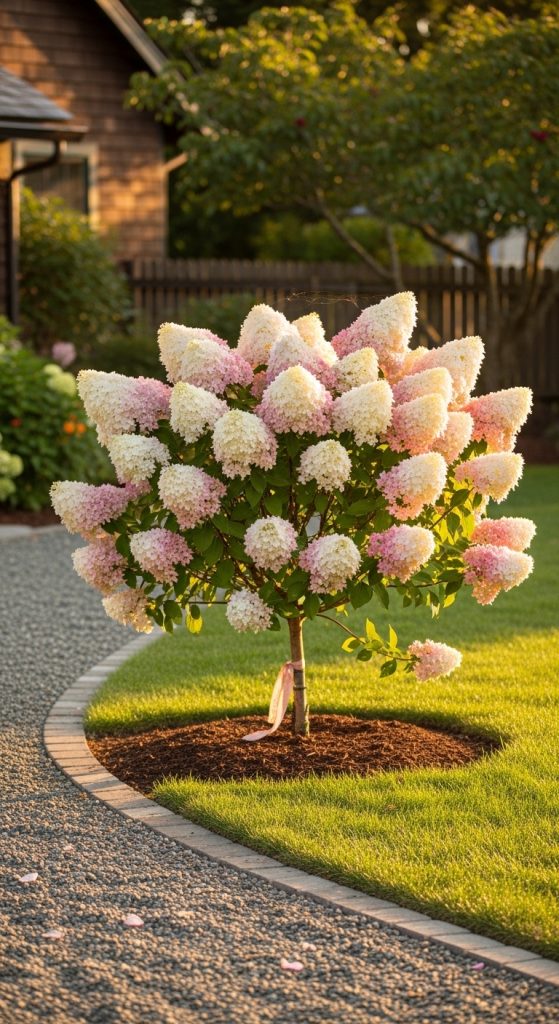
Sometimes one is better than a crowd. A single Limelight hydrangea planted as a standalone specimen in a prominent lawn spot can be stunning. But only if you commit to the concept.
Don’t just stick it in the middle of nowhere. Put it at the far end of a sightline from your patio. Or centered on a side yard you see from your kitchen window. Or at the bend of a pathway where it catches your attention as you turn the corner. Give it room—at least six feet from anything else—so its natural form becomes the whole show.
Pros
- Cheaper than mass plantings (one plant versus ten)
- Lets you appreciate the individual plant’s form and bloom progression
- Easier to maintain and prune without reaching around neighbors
Cons
- Looks lonely and weird if you choose the wrong spot
- One plant means one point of failure if something goes wrong
Mulch a generous circle around it—at least four feet across. Grass right up to the trunk looks messy. A clean mulch circle looks intentional, expensive, and makes mowing way easier.
11. Flank Garden Stairs or Steps
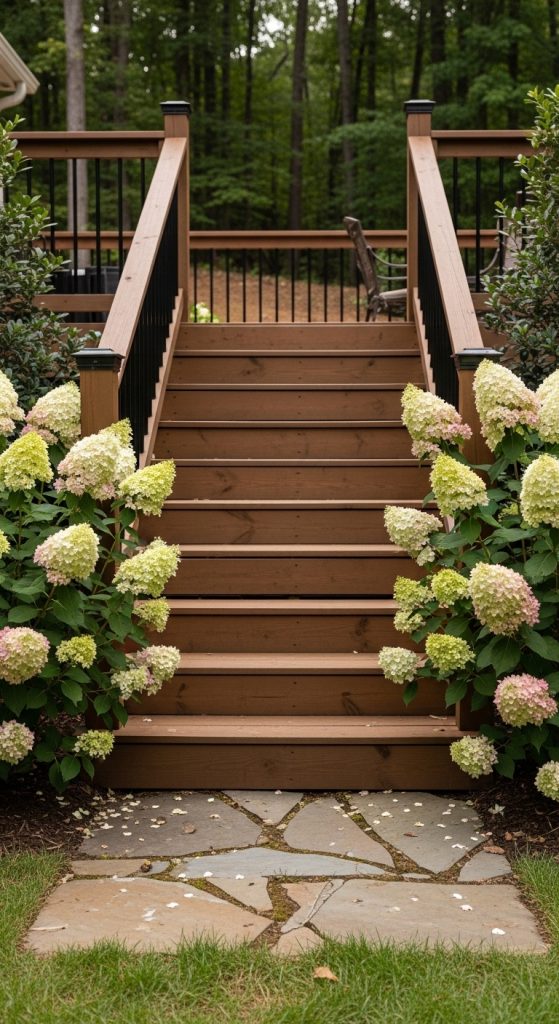
Steps into a garden or up to a deck often feel abrupt. You go from open space to vertical climb with nothing in between. Limelights on both sides of the bottom step change that completely.
Their rounded form softens the transition from horizontal ground to vertical stairs. The blooms at head height as you climb make you feel like you’re walking through something special. And they hide the inevitable mud and worn grass that happens at the base of frequently used steps.
Pros
- Dramatically improves the arrival experience at your entry points
- The plants naturally lean slightly toward the light, often toward the steps
- Hides ugly step foundations and supports
Cons
- Narrow staircases might feel crowded if plants get full size
- Stairs on north sides of buildings might not get enough bloom-producing sun
Stick to one plant on each side unless your stairs are wider than six feet. And prune them slightly narrower on the stair side than you would normally—you’ll thank me when you’re carrying groceries.
12. Use Three in a Cluster for Instant Impact
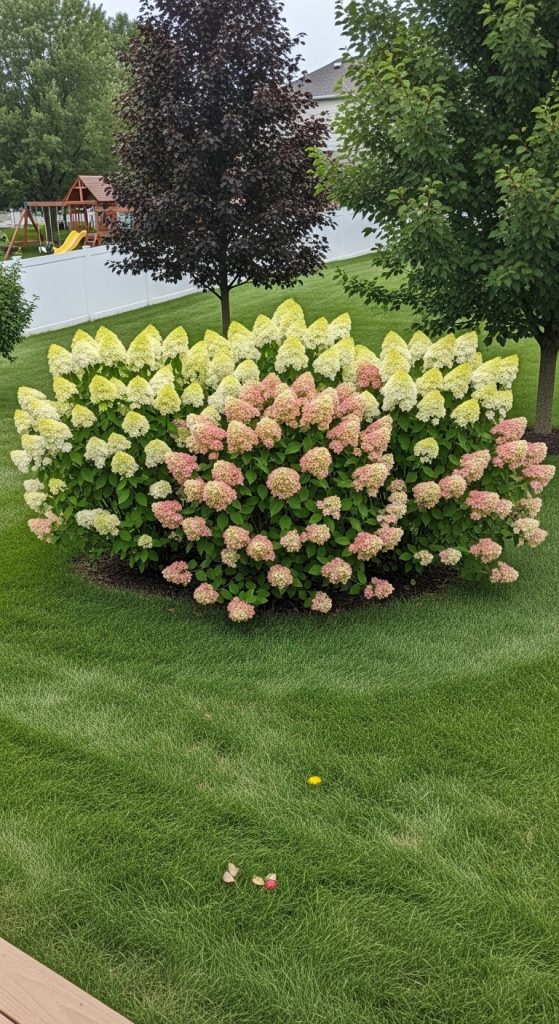
Here’s a landscaping secret designers use all the time. One plant looks like you planted one plant. Two plants look like a pair. But three plants in a triangular cluster? That looks like a deliberate garden design.
Plant three Limelights in a triangle, about four feet apart from each other. Their canopies will merge as they grow, creating one larger visual mass that reads as a single entity. It’s the same principle as planting three of anything, but with Limelights’ size, the effect is particularly dramatic.
Pros
- Creates a substantial presence without looking like a hedge
- Each plant gets light from the outer edges, so they all thrive
- Easier to remove one if needed without ruining the whole design
Cons
- Uses more plants and space than a single specimen without three times the effect
- The middle of the triangle can become a dead zone if you space them too tightly
Don’t plant them in a perfect equilateral triangle unless you’re a geometry nerd. A slightly irregular triangle looks more natural and less artificial. And leave yourself room to walk between them for pruning access.
13. Edge a Patio for Outdoor Room Definition
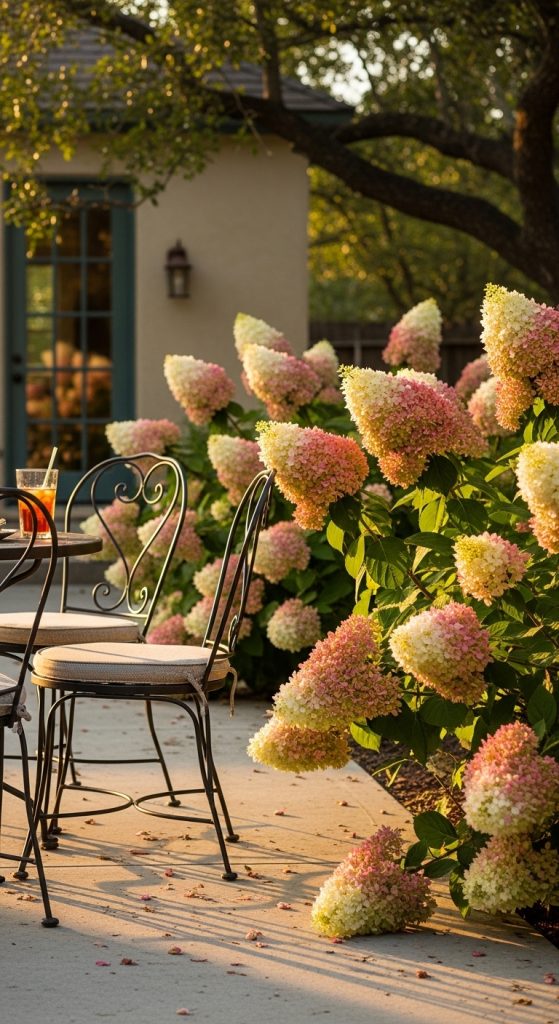
Patios often feel like furniture floating on a sea of concrete. Adding a border of Limelight hydrangeas around the perimeter changes everything. Suddenly your patio has walls. Soft, blooming, ever-changing walls.
Plant them two feet back from the patio edge so branches can overhang the pavers slightly without scraping people walking by. The blooms will literally hang over your seating area, putting you inside the garden rather than just next to it.
Pros
- Creates genuine outdoor room feel without building structures
- Blooms at sitting height for maximum enjoyment
- Provides afternoon shade for patio edges in hot climates
Cons
- Takes up yard space that might be needed for kids or dogs to run
- Fallen blooms on patio require occasional sweeping
Skip this idea if your patio faces north or is heavily shaded by trees. Limelights need at least four to six hours of sun to bloom well. A shady patio means green shrubs with no flowers, which defeats the whole point.
14. Plant Along a Fence Line at Intervals
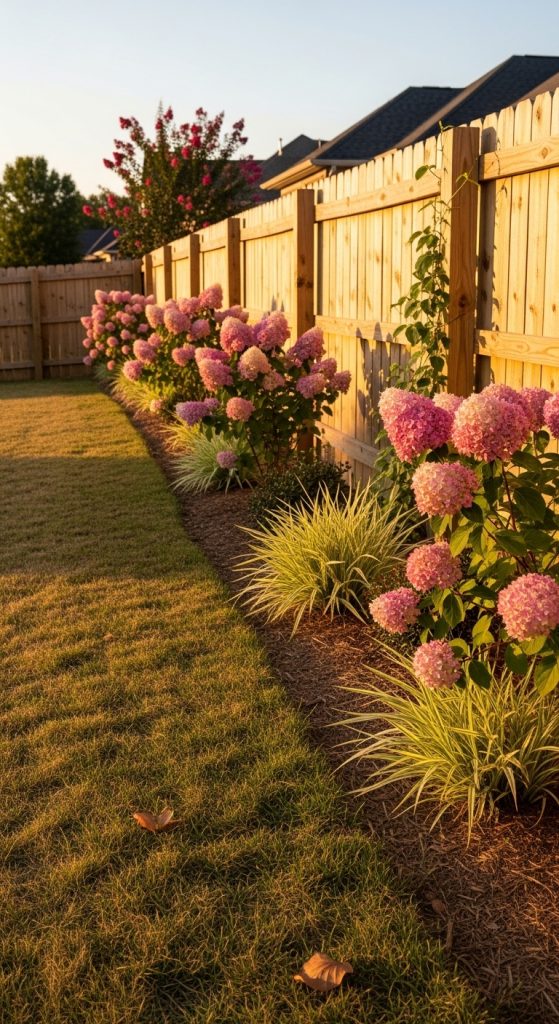
Fences are necessary but ugly. A solid row of shrubs against a fence looks like you’re trying too hard. But Limelights planted at intervals along your fence line? That’s the sweet spot.
Space them about eight feet apart. In between, plant something completely different—ornamental grass, a small evergreen, a birdbath. The rhythm of plant, space, different plant, space keeps your eye moving and makes the fence recede into the background where it belongs.
Pros
- Breaks up long monotonous fence lines without blocking views entirely
- Creates pockets of interest that reward walking the length of your yard
- Less expensive than a solid hedge of anything
Cons
- Winter reveals your fence fully again (plan for that or don’t care about it)
- The gaps between need something or they’ll look like failed hedge attempts
Start and end your row with a strong plant. A Limelight at each end, then alternate down the middle. Weak bookends make the whole planting look weak. Strong bookends carry everything between them.
15. Create a Boundary Marker Without a Fence
Not every property line needs a fence. Sometimes you just want a gentle suggestion that says, “My yard starts about here.” Limelight hydrangeas are perfect for this.
Plant them along your property line every six to eight feet, but set them back about three feet onto your side. You’re not building a wall. You’re creating a visual boundary that people naturally respect without feeling barricaded. Neighbors can still see through them in winter. Summer gives you a soft green and cream screen that feels friendly, not hostile.
Pros
- Much cheaper than fencing (even buying ten hydrangeas is less than vinyl panels)
- Adds beauty instead of blocking it
- Flexible if property lines are fuzzy or disputed
Cons
- Provides zero security or pet containment
- Takes a couple years to reach effective screening height
Talk to your neighbor before you do this if the line is close to their yard. Seriously. A quick conversation prevents so much drama. Most neighbors love the idea of pretty flowers near their property. They just want to be asked.
The Truth About Making These Work
Here’s what I’ve learned after killing my share of plants and finally getting it right. Limelight hydrangeas are forgiving, but they’re not miracle workers. Give them decent soil, consistent water the first year, and at least four hours of direct sun. That’s the baseline.
The rest is just editing. Walk your yard at different times of day. Notice where your eye naturally rests. Notice where it skips over. Those skipped spots are where Limelights belong. They’re not the star of every show, but they’re the best supporting actor your landscape could ask for.
Pick one idea from this list. Just one. Try it this season. See how it feels. Because honestly, the biggest mistake people make is trying to do all fifteen at once and getting overwhelmed. Your yard isn’t a Pinterest board that needs to be perfect tomorrow. It’s a living thing that grows with you.
Start with the driveway anchor or the patio edge. Those are the easiest wins. Then let yourself get addicted like the rest of us. There’s a reason Limelight hydrangeas sell out at nurseries every single spring. Once you see them working in your own yard, you’ll understand completely.
15 Stunning Landscaping Limelight Hydrangea Ideas
Meta description
Tired of boring foundation plants? Try these 15 real-world limelight hydrangea landscaping ideas that actually work. From driveway anchors to patio borders.

William Martin is a passionate bowler who spends most of his weekends playing the sport. With years of intense experience under his belt, William decided to share his knowledge by creating BOWLING OCEAN. Join me on this journey to explore the world of bowling and discover the tips and tricks to becoming a pro.