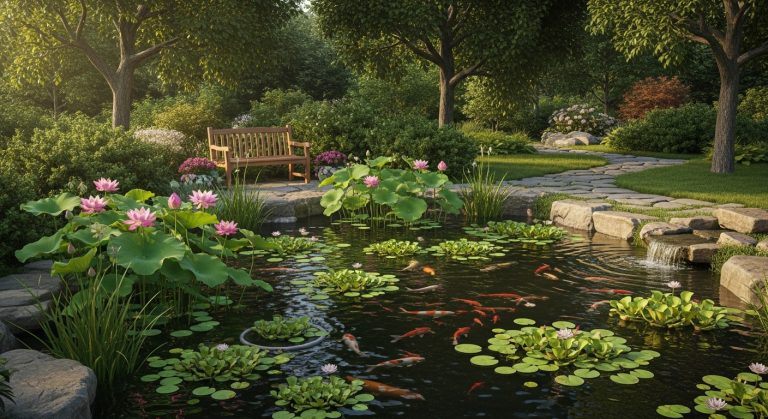
15 creative raised garden bed seating area designs for cozy outdoor living
I used to think gardening meant kneeling in mud, sweating in the sun, and rushing back inside the second I finished watering. Then one afternoon, I dragged an old kitchen chair next to my tallest raised bed just to rest for a minute. I sat there for an hour. I watched bees work the zucchini flowers. I noticed which tomatoes were ripening. I heard birds I had never heard before.
That chair never left that spot.
A raised garden bed seating area changed everything about how I garden. Instead of treating my vegetables like a chore list, I started treating my garden like a room. A room without a chair is just a hallway. You walk through it to get somewhere else. Add a seat, and suddenly you belong there. You stay. You notice. You enjoy.
After building seating into seven different raised beds over the years, I have learned exactly what works and what becomes a wasp nest or a mud collector. Here are fifteen real ways to add seating to your raised garden beds that you will actually use.
1. The Attached Cedar Bench on the Long Side
This was my first real seating project and still my favorite for large beds. Build a standard bench frame using two-by-four cedar boards, then attach the back legs directly to the outside wall of your raised bed. The bed itself becomes one of the bench’s supports, which saves materials and creates a seamless look.
The bench should run the entire length of your raised garden bed seating area so you can slide anywhere along the bed to reach different plants. Use weather-resistant screws and pre-drill your holes so the cedar does not split. Add a slight angle to the backrest so you can lean back comfortably while you stare at your peppers.
Pros
- Uses your existing raised bed as structural support
- Creates a cohesive, built-in furniture look
- Holds two or three people easily on longer beds
- Cedar naturally resists rot and insects
Cons
- Takes up space along the side of your garden path
- Requires basic carpentry skills and tools
- Permanent attachment means you cannot rearrange
I sat on mine this morning with coffee and watched a butterfly cycle through every single flower. That alone was worth the four hours of building.
2. Corner Seating with L-Shaped Design
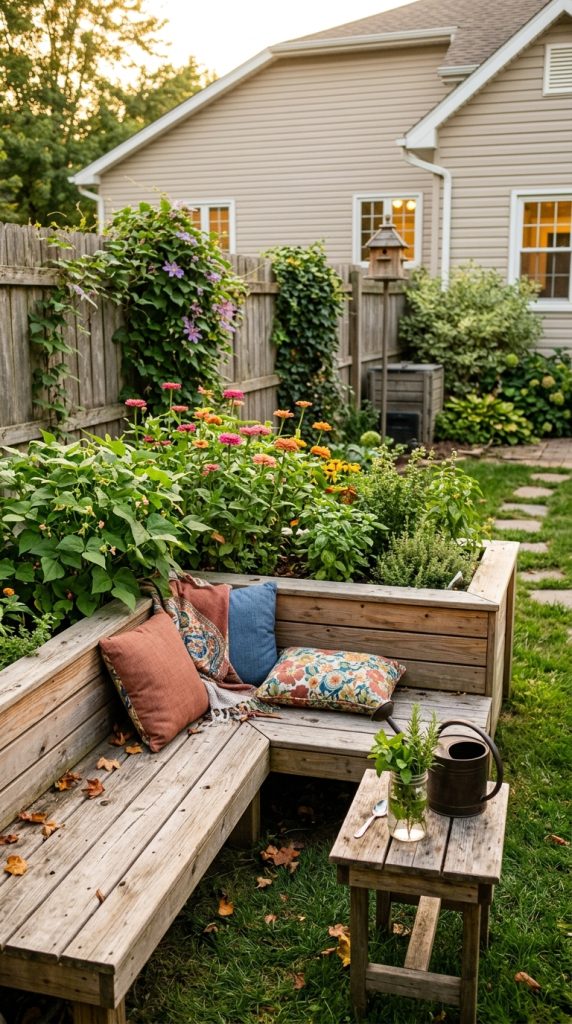
Corner spaces in gardens often become dead zones where nothing grows well because of awkward angles and shade from fences. Turn that wasted corner into the coziest seat in your yard. Build an L-shaped bench that wraps around the outside corner of a square or rectangular raised bed.
The two bench sections meet at ninety degrees, creating a protected nook that feels like a secret hideout. Install a small side table at the inside corner for your watering can, pruning shears, or iced tea. The L-shape also lets two people sit facing each other for actual conversations instead of staring straight ahead.
Pros
- Transforms an unusable corner into a functional space
- Creates natural conversation seating for two
- Offers protection from wind on two sides
- Looks intentional rather than like an afterthought
Cons
- Needs a corner location which not every garden has
- More complex cuts and angles than straight benches
- The inside corner can collect leaves and debris
Measure your corner angle before cutting anything. Most are ninety degrees but I have seen some odd fence lines that required creative problem solving.
3. The Drop-Leaf Workstation Seat
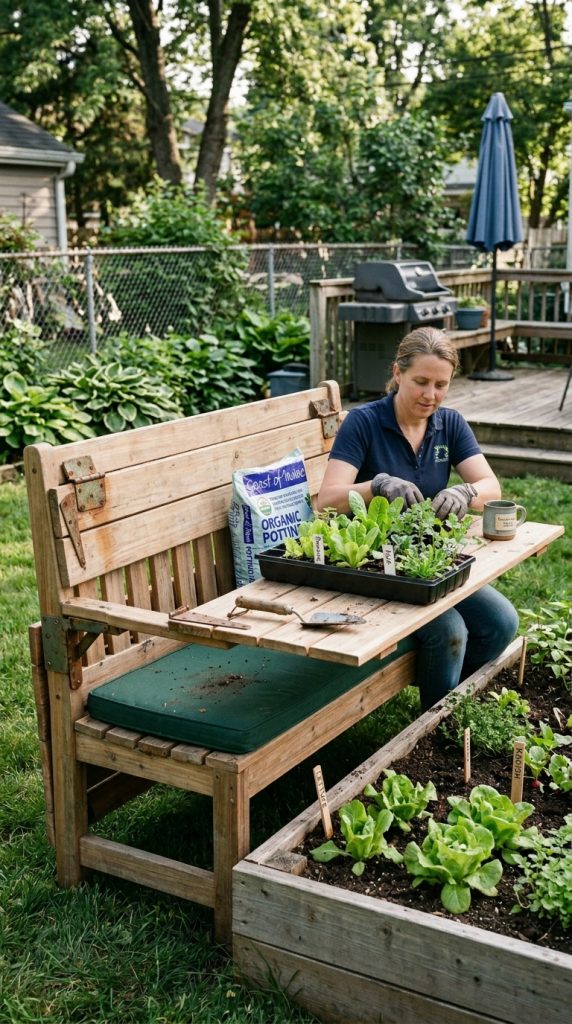
Here is the genius idea I stole from a tiny house tour on YouTube. Build a bench that doubles as a standing workstation by adding drop leaves to the backrest. When folded up, the leaves look like a tall wooden back. When folded down, they create a wide shelf behind the seated person perfect for potting, seed starting, or holding your phone while you watch gardening videos.
Install heavy duty folding hinges rated for outdoor use. Add a removable cushion to the bench section so you can sit comfortably or take the cushion off and use the bare wood for messy potting soil projects. A small lip on the drop leaf keeps seed packets from sliding off.
Pros
- One piece of furniture serves two completely different purposes
- Saves space compared to separate bench and table
- Folded leaves protect the shelf surface from rain
- Makes your raised garden bed seating area genuinely useful
Cons
- Folding hinges cost more than standard hardware
- The drop leaves need bracing to hold heavy pots
- Takes careful planning to get hinge placement right
I built one of these for my wife who loves starting seeds outdoors. She uses the drop leaf as a mini greenhouse bench for six weeks every spring.
4. Swinging Bench Attached to a Reinforced Bed
Most raised beds cannot handle the dynamic weight of a swinging bench. People swing, which creates side to side forces that pull on screws and brackets. But reinforce your bed properly, and a garden swing becomes the most magical seat you have ever owned.
Start with a raised bed frame made from six-by-six timbers instead of standard two-by lumber. Install heavy duty swing hangers bolted completely through the timber with washers and lock nuts on both sides. Hang a wooden bench seat on chains or rope. Position the swing on the longest side of your bed with plenty of clearance in front.
Pros
- Turns garden chores into a playful experience
- The gentle motion helps you relax and observe
- Children absolutely adore helping you garden now
- Becomes the focal point of your entire yard
Cons
- Requires serious structural reinforcement
- Needs more clearance space than stationary benches
- Chain lubrication becomes a maintenance task
A survey from the National Gardening Association found that gardeners with seating spend twice as much time in their gardens. Swinging probably triples that number.
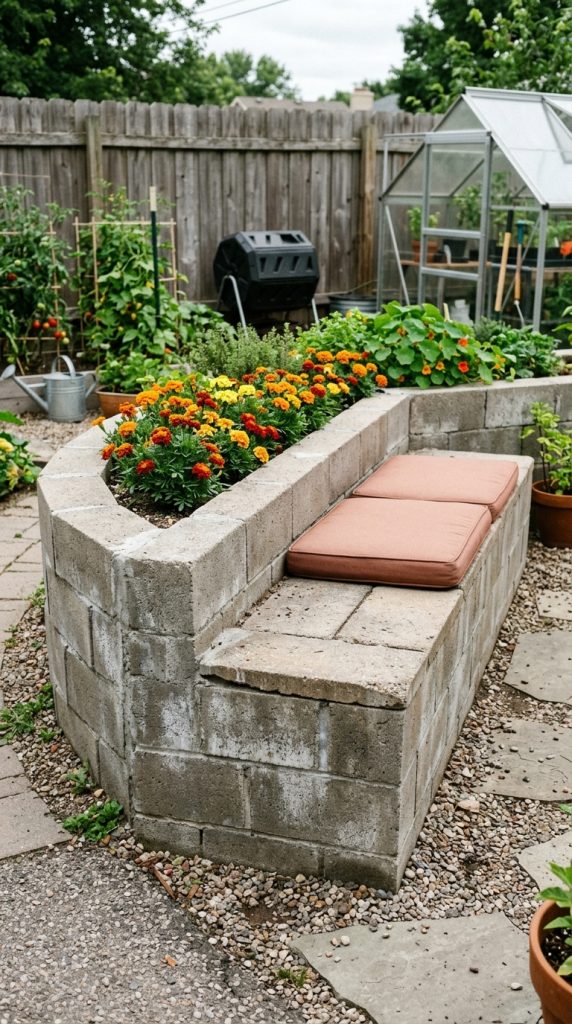
5. Concrete Block Bench Built Into Bed Wall
Concrete blocks cost about two dollars each and stack into furniture with no cutting or special skills. Build your raised bed walls using standard eight by eight by sixteen inch blocks. Extend one section of the wall outward to create a bench shape. Fill the block cores with gravel for stability, then cap everything with flat concrete pavers.
The bench becomes part of the bed structure rather than an attachment. Paint the blocks with masonry paint in a color that complements your house or leave them raw for an industrial look that fades beautifully. Add outdoor cushions to make the concrete comfortable.
Pros
- Nearly indestructible and will last forever
- No wood to rot, no screws to rust
- Blocks can be rearranged if you change your mind
- Very beginner friendly with no saws required
Cons
- Concrete is cold and hard without cushions
- Very heavy to move if you relocate your garden
- Takes up more space than wooden benches
I built these for a community garden project where theft and vandalism were concerns. Nobody steals a concrete bench.
6. The Fold-Down Wall Seat
Small gardens cannot spare permanent floor space for benches. The solution is a seat that disappears when you do not need it. Attach a wooden bench top to your raised bed wall using heavy duty piano hinges. When folded up, the bench hangs flat against the bed side. When folded down, two hinged legs swing out from underneath to support the front edge.
Install a magnetic latch to hold the bench securely in the upright position. Add a simple hook and eye latch for the folded legs so they do not dangle while you walk past. The whole thing tucks into a three inch thick profile against your bed.
Pros
- Zero permanent footprint in your garden paths
- Perfect for narrow spaces between beds
- Folds up out of rain and snow for longer life
- Impresses everyone who sees you unfold it
Cons
- The hinge mechanism needs occasional lubrication
- Folded bench can collect dirt and cobwebs
- Weight capacity is lower than fixed benches
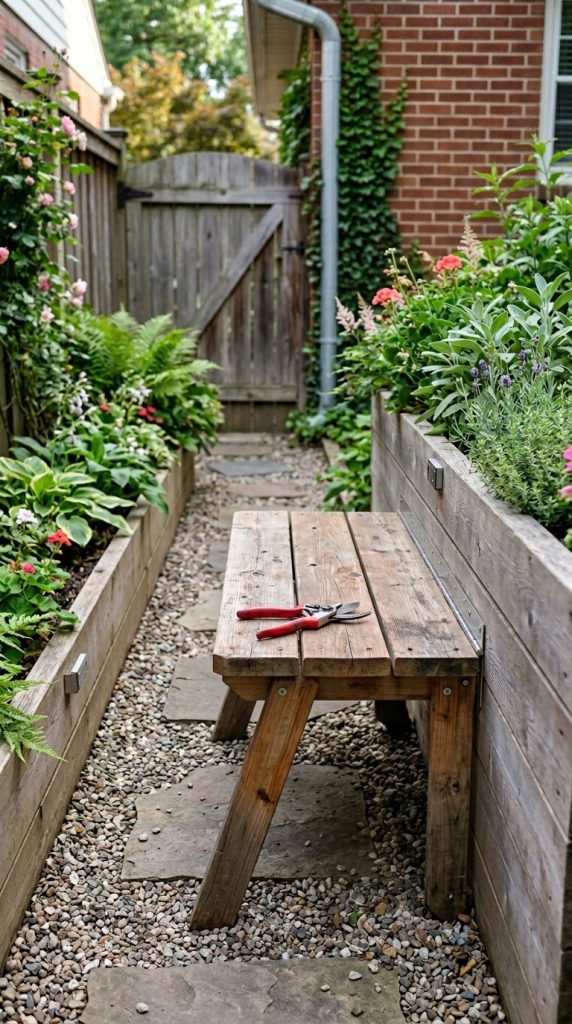
This saved my narrow side yard garden where every inch matters. I fold the seat down for morning coffee and fold it up to wheel my garden cart past.
7. Curved Bench Following a Round Bed
Round raised beds are having a moment right now, and they deserve custom seating. Build a curved bench that hugs the outside curve of your circular bed. Use thin plywood as a bending form, then laminate multiple layers of thin wood strips around the curve with waterproof glue. The result is a smooth arc that looks like it grew there.
Keep the bench height at eighteen inches, which is standard for comfortable sitting. The backrest should follow the same curve but stand six inches taller. Add curved armrests at both ends if you want to get really fancy with your raised garden bed seating area.
Pros
- Perfectly complements circular garden designs
- Creates a natural gathering spot for conversations
- The curve is more ergonomic for your back
- Looks like professional landscape architecture
Cons
- Bending wood requires clamps, forms, and patience
- Not a weekend project for beginners
- Curved cushions cost extra if you want them
I hired a woodworker friend to help with this one because my first attempt looked more like a wavy potato chip than a bench.
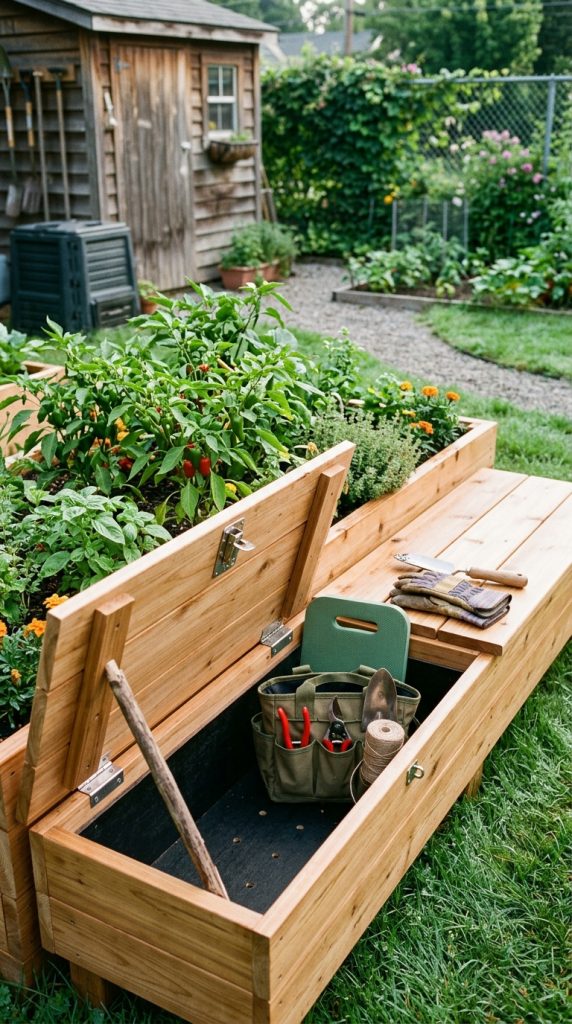
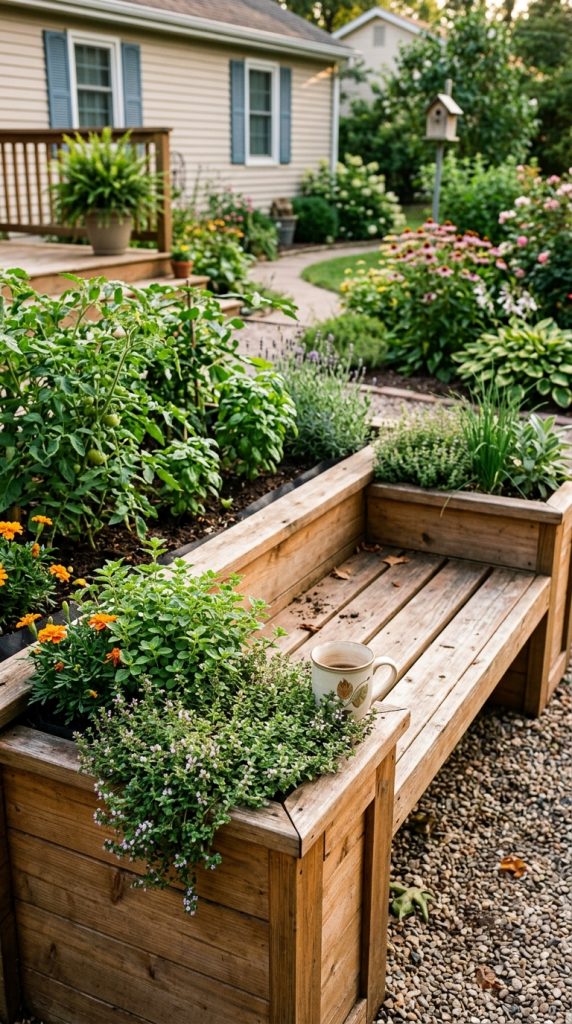
8. Bench with Integrated Tool Storage
Gardeners always need something within reach. Pruners. Twine. Gloves. Hand trowel. A regular bench makes you get up every thirty seconds to grab another tool. Build storage directly into your bench instead. Create a hinged bench seat that lifts open to reveal a waterproof storage compartment inside.
Use cedar or redwood for the bench frame and add a marine grade latch to keep the lid closed. Drill a few small drainage holes in the bottom just in case rain sneaks in. Inside, install removable trays or simply toss everything in a canvas bag. Store your kneeling pad in there too.
Pros
- Keeps your most used tools exactly where you sit
- Protects tools from rain and dew
- Eliminates trips back and forth to the shed
- The storage box adds weight and stability
Cons
- Hinged lids can slam on fingers without soft close hardware
- Storage volume is limited by bench size
- Tools rattle around when you sit down
I keep a spare pair of gloves, my favorite pruners, and a headlamp for evening gardening in mine. Everything is always right there.
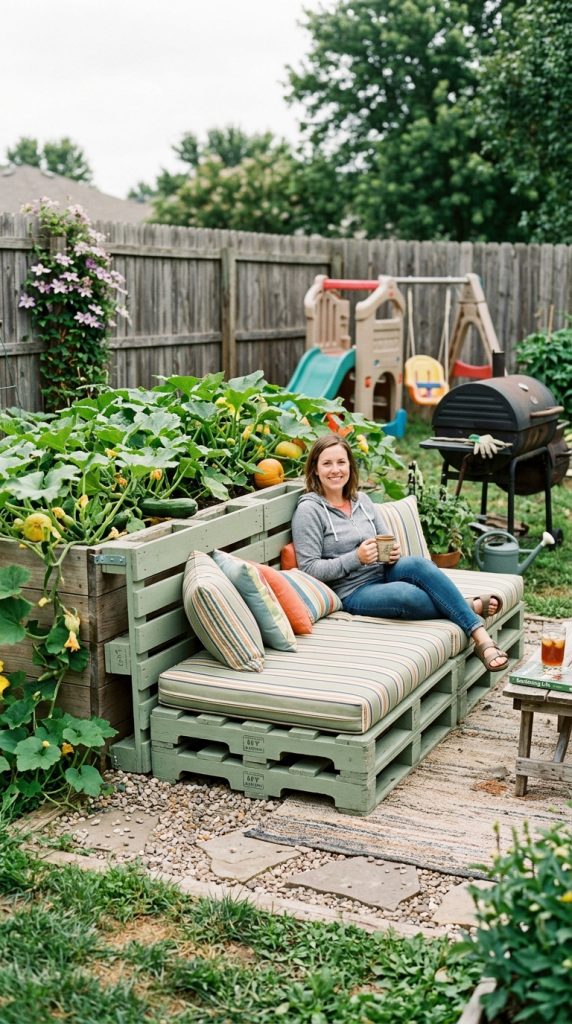
9. The Pallet Couch for Extra Wide Beds
Three standard pallets arranged in a U shape create a deep couch rather than a narrow bench. Place two pallets side by side as the seat base and one pallet standing upright behind them as the backrest. Attach the pallets to each other using metal brackets, then attach the whole couch to the side of your raised bed.
Sand every surface thoroughly because pallets love to give splinters. Paint or stain them in a cheerful color. Add thick outdoor cushions across the entire seat area. The result is a couch wide enough to curl up on for afternoon reading or to hold three people side by side.
Pros
- Extremely cheap or free if you find shipping pallets
- Creates a deep, lounging style seat
- U shape wraps around you for comfort
- Light enough to move for bed access
Cons
- Pallet wood quality varies wildly
- Requires checking for heat treated stamps, not chemical treated
- Cushions for this size cost more than the pallets
Look for pallets stamped with HT which means heat treated. Avoid MB stamped pallets entirely.
10. Herbal Armrest Planter Bench
This idea came to me while sitting on my bench wishing I had fresh rosemary to smell without standing up. Build a standard bench attached to your raised bed, but extend the armrests into planter boxes. Each armrest becomes a small wooden box filled with soil and planted with low growing culinary herbs.
Thyme, oregano, creeping rosemary, and dwarf marigolds work perfectly in armrest planters. Line the planters with landscape fabric to keep soil in while letting water drain. When you sit down, your hands naturally rest right next to fragrant herbs. Brush the leaves as you sit and the scent releases.
Pros
- Surrounds you with amazing smells while you rest
- Keeps cooking herbs steps away from your kitchen
- The planters soften the look of wooden benches
- Watering armrest plants is oddly satisfying
Cons
- Armrest planters need regular watering
- Soil adds weight that stresses bench joints
- Herbs can outgrow small planters quickly
I planted creeping thyme in mine two years ago and it has spilled over the edges in the most beautiful way. Every sit feels like a spa moment.
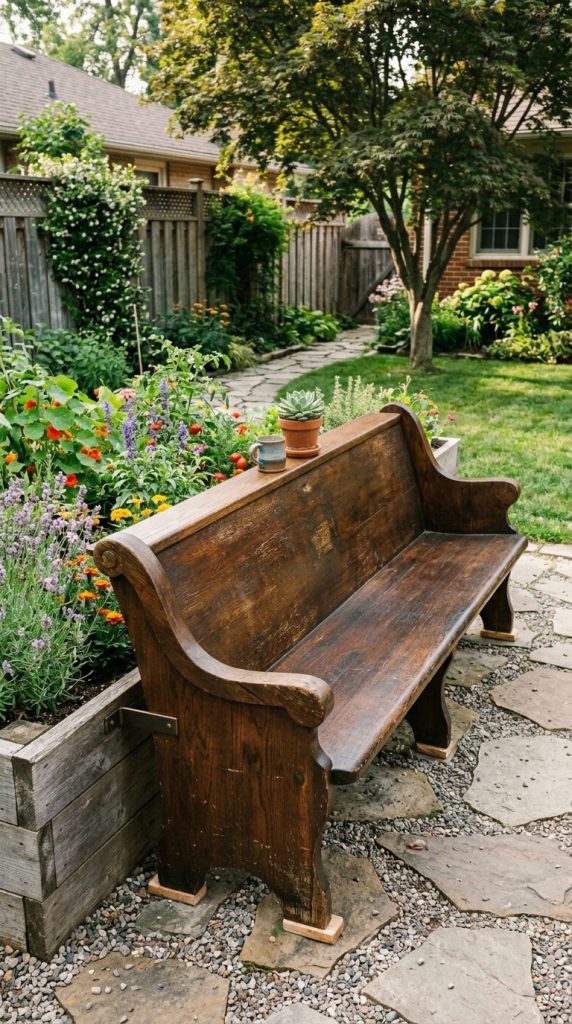
11. Repurposed Church Pew
Old church pews show up on Facebook Marketplace for next to nothing because churches remodel and nobody wants heavy wooden seating anymore. You want one. A solid oak pew weighs a ton, lasts forever, and already has the perfect ergonomic curve for human backs.
Place the pew alongside your raised bed. If the pew is taller than your desired seat height, cut the legs down using a circular saw. Attach the pew to your raised bed frame using heavy duty corner brackets to prevent tipping. The existing kneeler on the back of many pews becomes a handy shelf for your coffee cup.
Pros
- Genuine antique character you cannot replicate
- Extremely comfortable curved back design
- Often holds eight to ten feet of seating
- Already finished and sealed from decades of use
Cons
- Moving a solid oak pew requires multiple strong friends
- The traditional style does not fit every garden
- Cutting antique legs feels slightly wrong
I found mine for twenty dollars. The moving cost me a pizza and three friends. Worth every penny and every slice.
12. Stepped Terrace Bench for Sloped Gardens
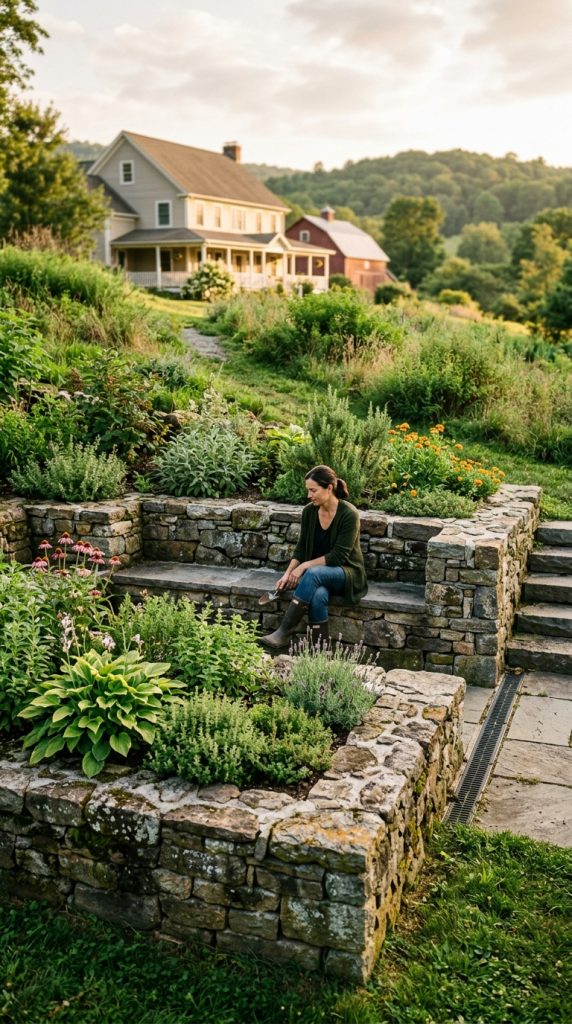
Gardens on slopes present a seating challenge because a standard bench ends up feeling tilted. Build a stepped terrace bench instead. Create two or three raised beds at different heights like giant stairs. The front edge of each higher bed becomes a bench for the level below.
The lowest bed has a standard bench height of eighteen inches measured from the ground. The next bed up sits thirty-six inches high so its front edge works as a backrest for the lower bench. The highest bed provides back support for the middle level. You end up with an amphitheater of garden seating.
Pros
- Perfect solution for challenging sloped yards
- Creates dramatic, architectural garden design
- Each bench doubles as a planting bed
- Naturally forms an outdoor classroom or performance space
Cons
- Requires major excavation and construction
- Not a weekend project by any measure
- Water drainage between levels needs careful planning
A landscape architect friend helped me design this for a client with a steep backyard. The result won a local garden award.
13. Rolling Bench on Tracks
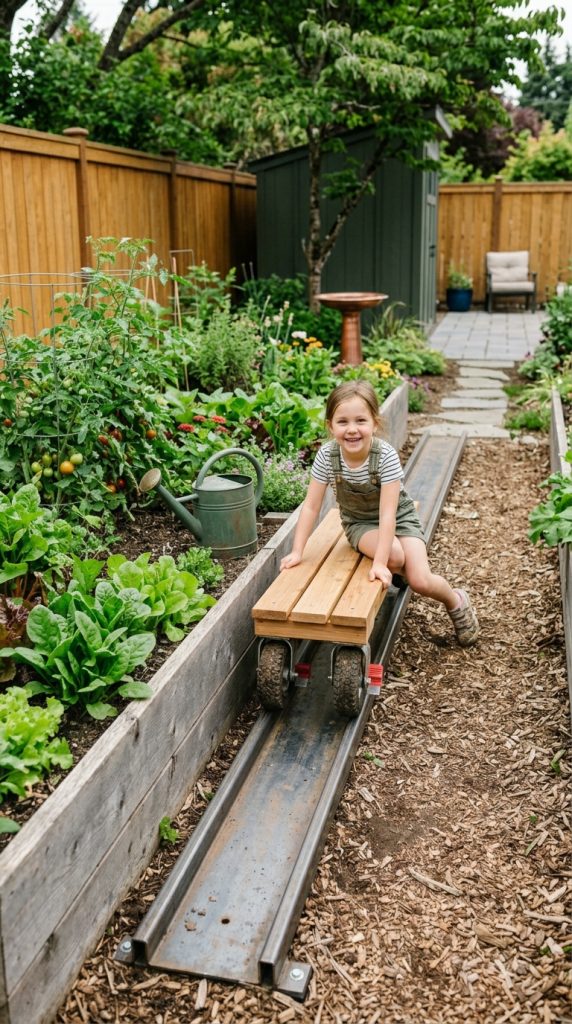
Fixed benches lock you into one viewing angle of your garden. A rolling bench lets you move along the entire length of your raised bed. Install a track system made from metal U channels attached to the ground. Build a bench on heavy duty casters that fit inside the track.
The track runs parallel to your raised bed so you can roll from one end to the other. Stop at the tomato section. Roll to the lettuce. Roll back to the peppers. Locking casters keep the bench still when you find your perfect spot. Add a foot brake to each caster.
Pros
- Gives you a front row seat to every part of your bed
- Makes garden maintenance a seated activity
- Children will fight over who gets to roll
- The track keeps the bench perfectly aligned
Cons
- Metal tracks need cleaning of leaves and dirt
- Casters can stick without regular lubrication
- Track installation requires a level base
I built a short prototype on a four foot track just to test the concept. My kids used it so much I had to build a full length version.
14. Adirondack Chair Built Into Bed Corner
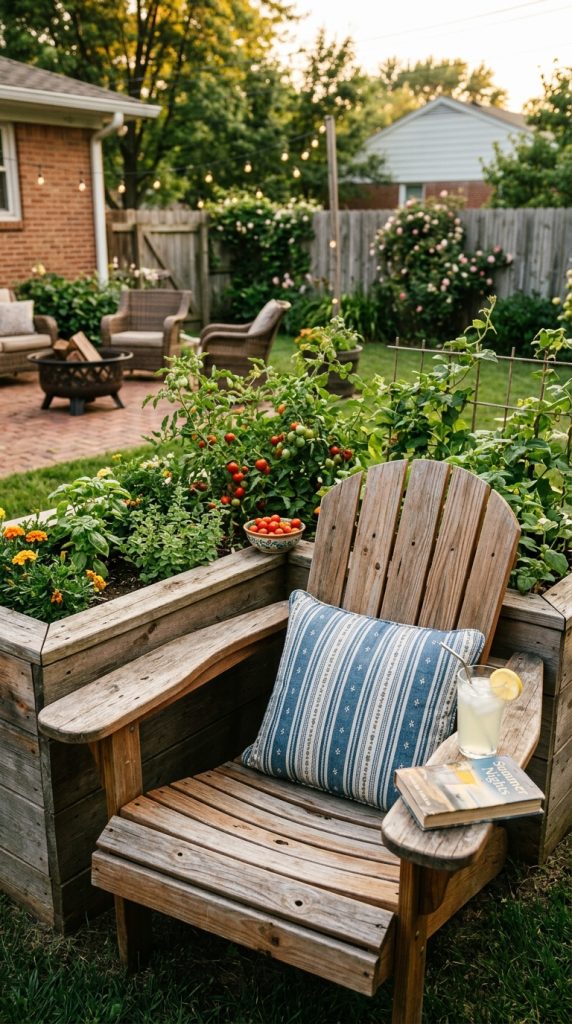
The Adirondack chair is already the most comfortable outdoor seating design ever created. Angled back, wide armrests, low seat. Build one directly into the corner of your raised bed by using the bed walls as the back support. The chair shares one corner of the bed frame as its rear leg structure.
Cut the signature curved Adirondack seat and back pieces from cedar or cypress. Attach the back pieces to a horizontal board mounted against your raised bed wall. The wide armrests give you space for a book, a drink, or a small bowl of cherry tomatoes picked fresh from behind you.
Pros
- The most comfortable seating position of any option
- Armrests are genuinely useful in a garden setting
- Built in corner placement saves space
- Classic American design never goes out of style
Cons
- Adirondack chairs need more depth than standard benches
- The angled seat collects rain water without drainage holes
- Cutting the curved parts requires a jigsaw or bandsaw
Drill three half inch drainage holes in the seat before assembly. Future you will appreciate this when you sit down on a dry bottom after a rainstorm.
15. The Breakfast Bar Seating Rail
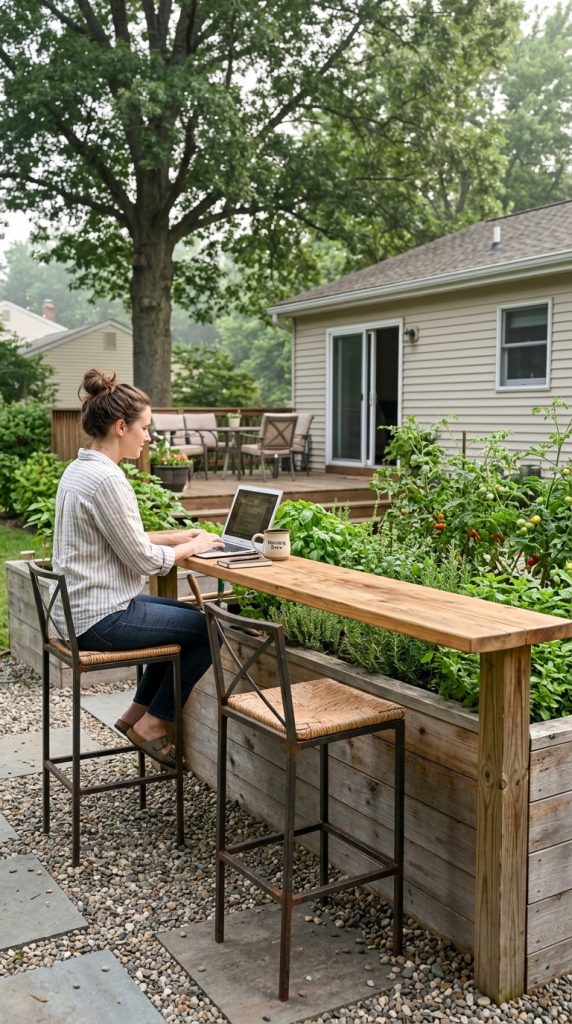
Sometimes you want to sit facing your garden, not facing the house. A breakfast bar rail turns the back side of your raised bed into counter height seating. Build one side of your bed to standard counter height of thirty six inches. Attach a twelve inch wide wooden rail along the top edge like a bartop.
Use tall bar stools or counter height chairs on the opposite side of the rail from your plants. You sit facing your garden with the raised bed acting as a table between you and the vegetables. Eat breakfast out there. Bring your laptop and work surrounded by green. The rail also gives you a place to set pots while transplanting.
Pros
- Changes your entire relationship with your garden
- The raised bed becomes usable horizontal surface
- Bar height seating is easier for tall people
- Creates a clear boundary between paths and beds
Cons
- Thirty six inch tall raised beds cost more to fill with soil
- Bar stools take up more storage space than benches
- Not comfortable for very long sitting sessions
According to garden designer Julie Moir Messervy, vertical variety in seating heights makes outdoor spaces feel more dynamic. My breakfast bar proved her right every single morning.
Make Your Garden a Place You Want to Be
Here is what I have learned after years of building raised garden bed seating areas. The food you grow matters, of course. Fresh tomatoes taste better than anything from a store. But the time you spend in your garden matters just as much. Maybe more.
A seat changes everything because it invites you to stop doing and start being. You stop pulling weeds and start watching the light shift through the bean leaves. You stop worrying about the squash bugs and start listening to the finches. You stop rushing and start resting.
Pick one idea from this list that matches your skill level and space. Build it this month. Then sit in it every single day, even for five minutes. Let your garden become a room you live in, not just a chore you finish.
I will be on my corner bench with coffee if you need me.

William Martin is a passionate bowler who spends most of his weekends playing the sport. With years of intense experience under his belt, William decided to share his knowledge by creating BOWLING OCEAN. Join me on this journey to explore the world of bowling and discover the tips and tricks to becoming a pro.