15 Wood Deck Railing Ideas That Transform Your Outdoor Space
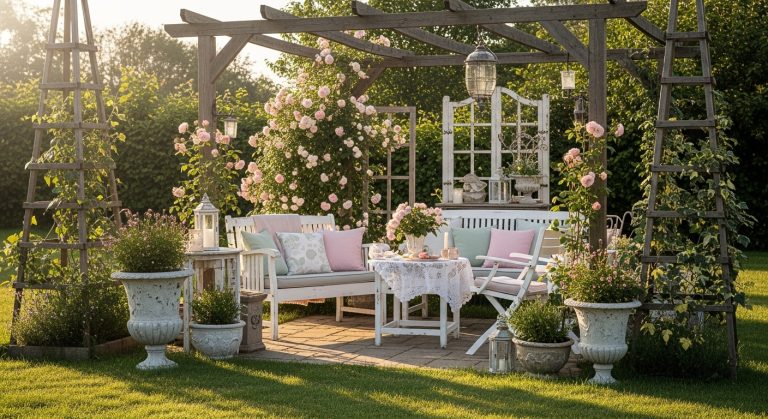
Last summer, I sat on my back deck with a cold drink and realized something depressing. I was staring at the same plain, box-store railing that every other house in my neighborhood had. You know the one. Basic wood balusters, simple top rail, absolutely zero personality. It didn’t feel like my space. It felt like a rental.
That’s when I started obsessing over wood deck railing ideas. And honestly? The transformation shocked me. Changing the railing changed everything about how I used my deck. Suddenly I wanted to be out there. I wanted to host dinners. I wanted to show it off.
The good news is you don’t need a complete rebuild to get there. I’ve gathered fifteen actual, achievable wood deck railing ideas that real people are using right now. Some are simple weekend projects. Others take more time. But every single one will make your deck feel like yours.
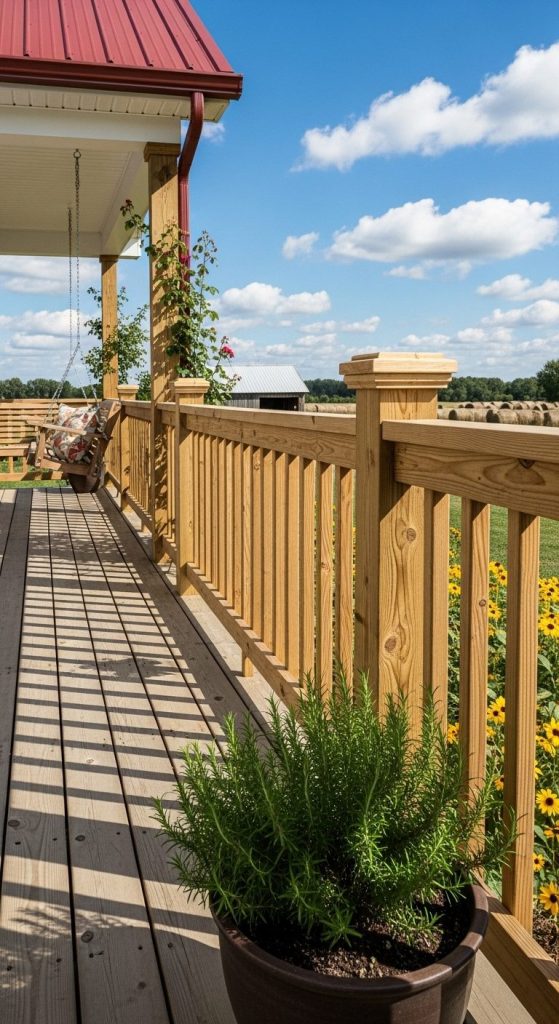
1. Horizontal Wood Railings for a Modern Farmhouse Look
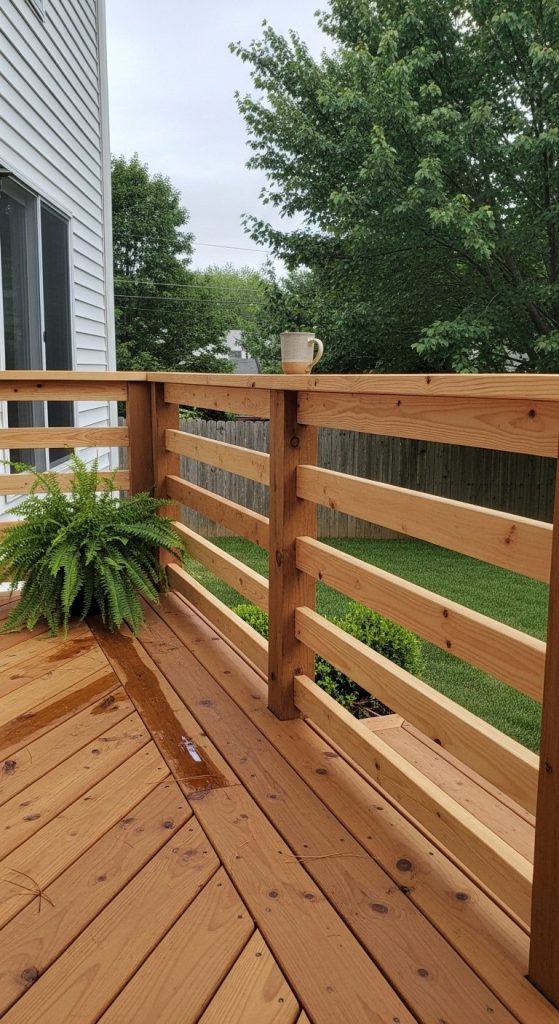
I’ll be honest. When I first saw horizontal railings, I thought they belonged in commercial buildings or modern art museums. Then a friend installed them on her farmhouse deck, and I couldn’t believe how good they looked. The clean lines draw your eye across the yard instead of chopping the view into little pieces. You use standard 2x4s or 2x6s mounted horizontally between posts instead of vertical balusters.
Pros:
- Creates an open, airy feel that makes small decks look larger
- Easier to clean because there are fewer nooks and crannies
- Doubles as a shelf for drinks or potted plants during parties
Cons:
- Young kids can climb horizontal rails more easily than vertical ones
- Requires precise measuring to keep gaps consistent
Here’s what I learned from my friend’s experience. Space your horizontal boards no more than four inches apart if you have kids or pets. That meets most building codes while keeping the modern look intact. The installation takes patience, but the result feels like you hired a designer.
2. Cable Railing with Wood Posts and Wood Top Rail
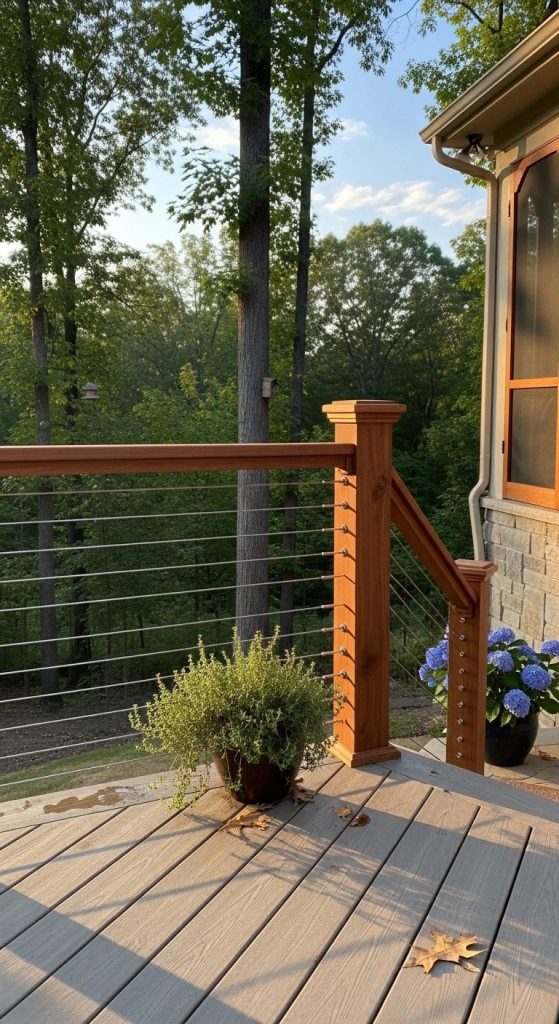
This one surprised me because I assumed cable railings were strictly for metal and glass lovers. But pairing stainless steel cables with warm wood posts and a thick wood top rail creates something special. The cables disappear visually, so your view stays clear. Meanwhile the wood keeps everything feeling cozy and organic. It’s the best of both worlds.
Pros:
- Unobstructed views make your yard feel connected to your deck
- Cables won’t warp, rot, or need painting like wood balusters
- Wood posts add warmth that softens the industrial cable look
Cons:
- Cable kits cost more than traditional wood balusters
- Tensioning cables correctly takes patience and the right tools
A deck builder I talked to said cable railings have become his most requested upgrade. People want views, but they don’t want glass that shows every fingerprint and water spot. Cables solve that problem while wood elements keep the space from feeling like a corporate lobby.
3. DIY Reclaimed Barn Wood Railing Sections
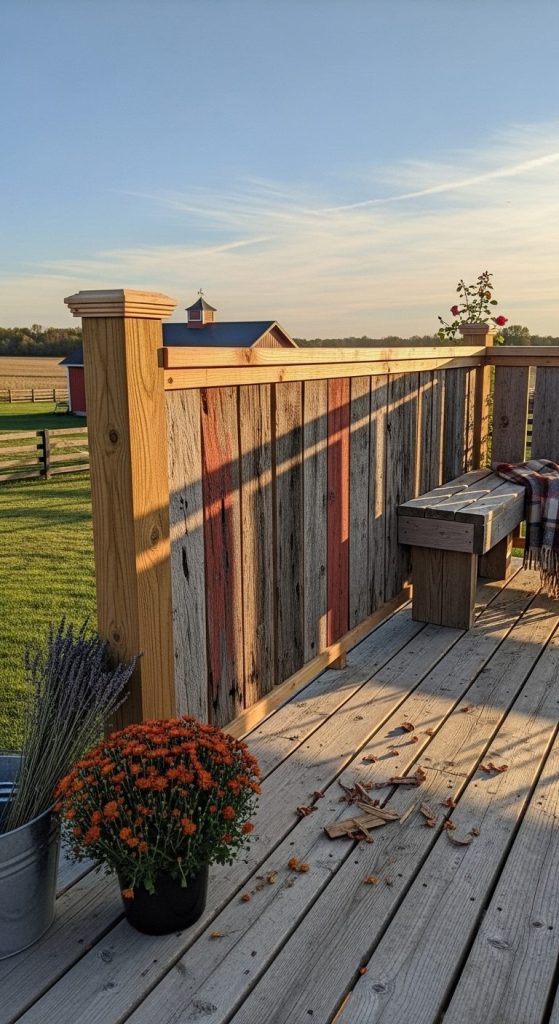
Let me tell you about the most character-filled deck I’ve ever seen. The owner found an old barn being torn down and asked if she could take the wood. She cut the weathered boards into railing sections and mounted them between new pressure-treated posts. The contrast between the silvery, nail-hole-covered barn wood and the fresh posts was stunning. Every piece told a story.
Pros:
- Genuinely unique look that absolutely no one else will have
- Barn wood is usually free or very cheap if you’re willing to hunt for it
- Weathered appearance hides future scratches and wear
Cons:
- Finding enough barn wood in good condition takes serious effort
- Old wood can harbor bugs or need treatment before installation
Before you run off to find a barn, know this. You’ll need to inspect every board for rot and wood-boring beetles. A quick trip through a planer can remove the rough surface while leaving the weathered color. Just don’t skip the inspection step unless you want surprises later.
4. Scalloped Top Rail with Traditional Balusters
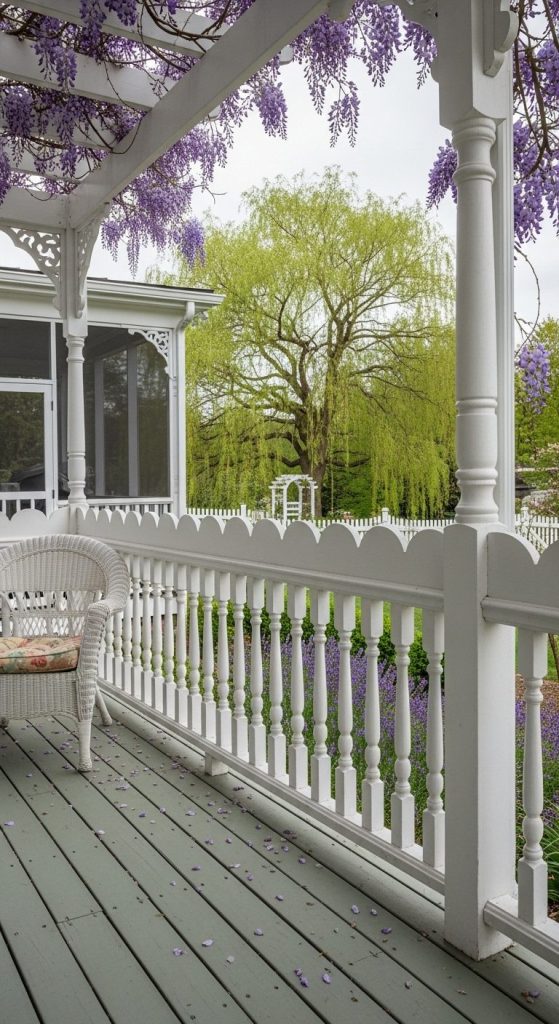
Remember those fancy Victorian houses with the wavy trim along the roofline? That scalloped detail looks incredible on a deck railing too. You start with standard wood balusters spaced normally, then replace the flat top rail with a board that has a scalloped or routed edge. Home centers sell pre-routed boards, or you can run a straight board through a router table yourself.
Pros:
- Adds architectural interest without changing the railing structure
- Pre-routed boards cost only slightly more than standard lumber
- Softens the look of square balusters beautifully
Cons:
- Scalloped edges collect dust and need slightly more cleaning
- Not the right fit for ultra-modern or minimalist homes
I installed this on my own deck last year, and the difference was immediate. My neighbor asked if I’d hired someone. Nope, just swapped the top rail over a weekend. The scalloped edge catches shadows in a way that makes the whole railing look more expensive than it actually is.
5. Mixed Width Balusters for Visual Rhythm
Here’s a trick that architects use but almost no homeowners know about. Instead of using identical balusters spaced evenly, alternate between wide boards and narrow boards. For example, use a 2×2, then a 1×2, then another 2×2. The alternating widths create a rhythm that your eye finds pleasing without knowing why. It’s subtle, but it works.
Pros:
- Unique look that costs almost nothing extra to achieve
- Uses standard lumber sizes available at any hardware store
- Creates depth and shadow lines that flat railings lack
Cons:
- Requires more cutting and measuring than uniform balusters
- Some building inspectors get confused by non-standard patterns
Check your local building codes before starting. The gaps between any two balusters still need to be small enough that a four-inch sphere can’t pass through. As long as you maintain that rule, you can get as creative as you want with the pattern.
6. Wood and Wrought Iron Combination Railing
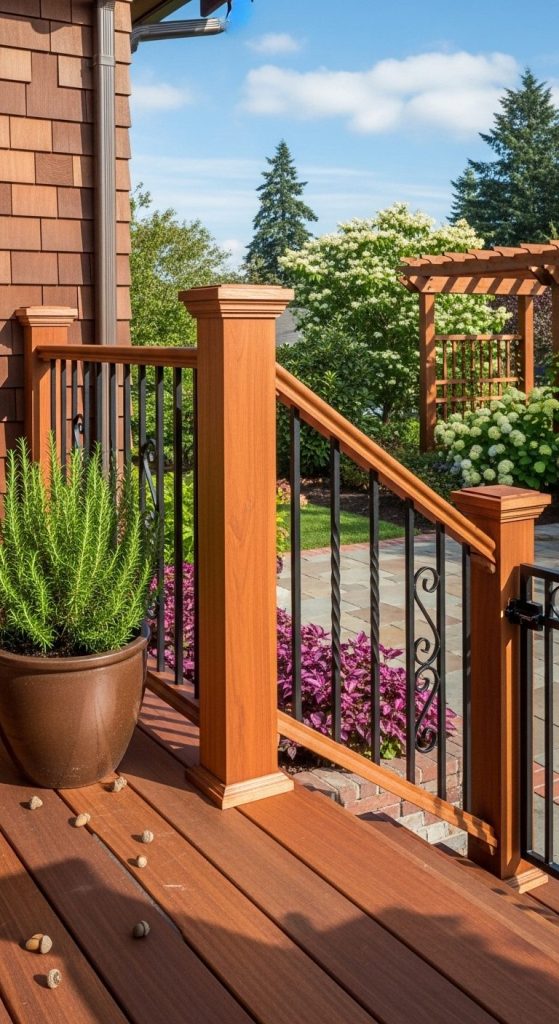
I saw this on a craftsman-style bungalow and immediately started planning my own version. The homeowners used chunky wood posts and a wide wood top rail, but filled the space between with pre-made wrought iron baluster panels. The iron adds elegance and lightness while the wood keeps everything grounded. It feels like something from a restored historic home.
Pros:
- Iron panels install faster than cutting dozens of wood balusters
- Creates high-end look for less than all-custom woodwork
- Iron won’t rot or warp like wood balusters can
Cons:
- Iron rusts over time and needs repainting every few years
- Matching wood stain to iron paint color takes careful planning
The best part about this combination is how it handles curves. Iron panels can be custom-made to follow curved deck edges, something that’s tricky with straight wood balusters. If your deck has interesting angles or rounded sections, this might be your answer.
7. Plank Style Railing for Total Privacy
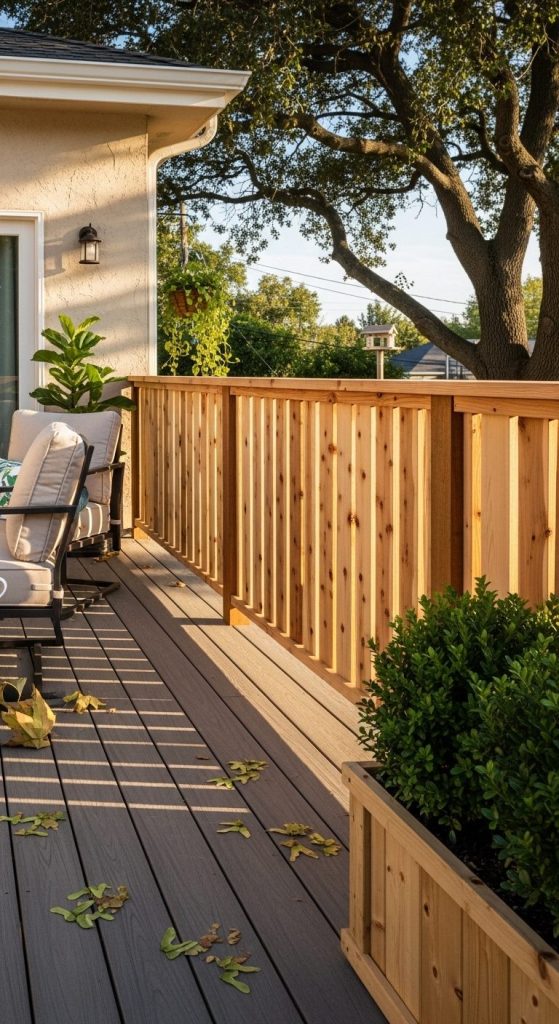
Sometimes you don’t want to see your neighbors. Sometimes you want your deck to feel like a secret room hidden in the trees. Plank style railings use solid boards installed vertically with no gaps between them. You can leave them full-height for complete privacy or vary the board heights for a more modern staggered look.
Pros:
- Blocks wind, sun, and neighbor views effectively
- Creates a blank canvas for hanging plants or outdoor art
- Sturdy enough to lean against without worrying
Cons:
- Blocks air flow, which matters on hot summer days
- Can feel boxed in or claustrophobic on small decks
According to a survey by the American Society of Landscape Architects, privacy features are among the top five requests from homeowners. People want their outdoor spaces to feel like retreats. Plank railings deliver that privacy while still looking like intentional design rather than a fort.
8. Recessed Panel Railing for Raised Decks
Have you ever noticed how kitchen cabinet doors have that inset panel detail? You can do the same thing with deck railings. Build a frame around each railing section, then set a thinner panel slightly recessed into the frame. The shadow line around each panel adds incredible depth. This works especially well on raised decks where people see the railing from below.
Pros:
- Architectural detail that looks custom and expensive
- Panels can be painted a different color than the frame for contrast
- Stronger than baluster railings because panels distribute force
Cons:
- More lumber and more cuts than simple baluster designs
- Heavy, so you’ll need help lifting sections into place
This is not a weekend project for beginners. But if you’ve got some carpentry experience and a decent miter saw, you can absolutely pull this off. The finished look will make your deck the envy of every barbecue guest.
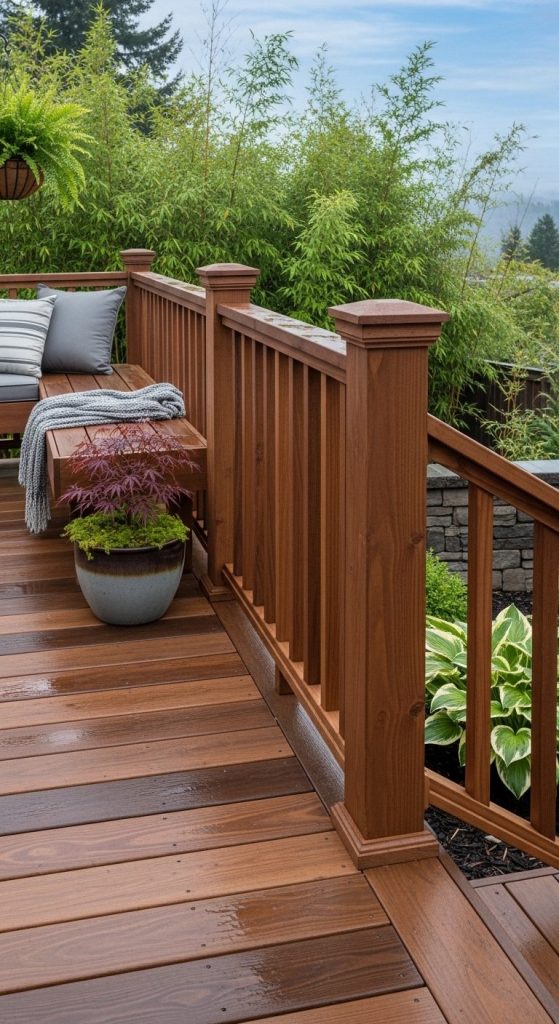
9. Curved Top Rail with Cedar Balusters
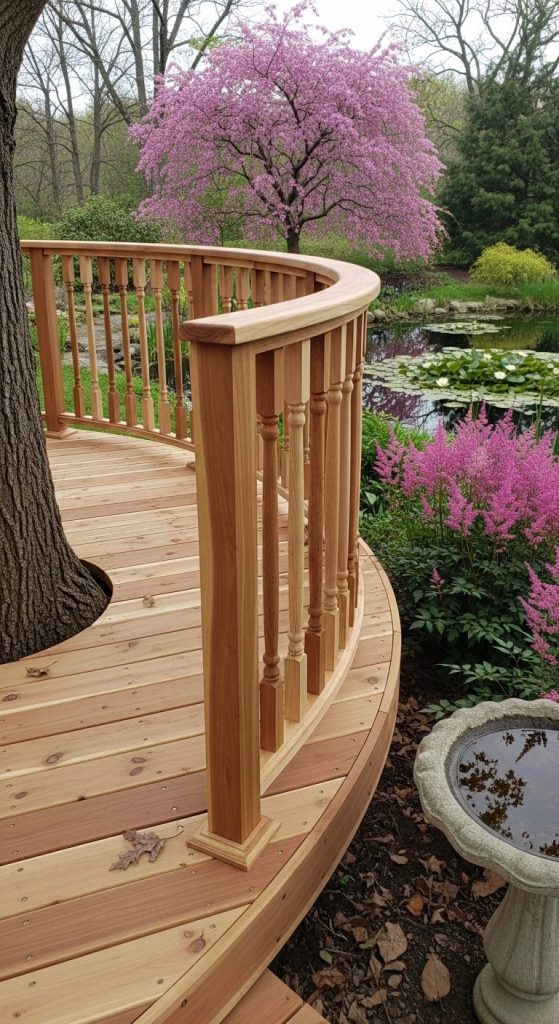
Straight lines are fine. Curves are memorable. A curved top rail follows the arc of a circular deck or creates gentle waves along a straight deck. You can buy flexible top rail material or laminate thinner boards together over a form. Cedar balusters underneath keep the natural wood theme going while the curved rail adds that unexpected wow factor.
Pros:
- Turns an ordinary deck into a conversation piece
- Cedar resists rot and insects naturally without chemicals
- Curves feel softer and more organic than sharp corners
Cons:
- Bending wood takes special techniques and sometimes steam
- Flexible railing materials cost significantly more than straight lumber
I watched a YouTube video of someone building a curved top rail using thin strips of cedar glued and clamped around a plywood form. It looked tedious but totally doable. The final result was gorgeous. If you love a challenge, this one’s for you.
10. Board and Batten Style Railing
Board and batten is that classic look you see on barns and farmhouses. Wide vertical boards with narrow strips covering the seams between them. Applied to deck railings, it creates a solid surface with visible texture. The shadow lines from the battens add interest without needing complicated cuts or expensive materials.
Pros:
- Simple construction using only straight cuts
- Covers existing railings without full tear-out
- Paints beautifully because of all the shadow lines
Cons:
- Solid surface catches wind like a sail on elevated decks
- Battens collect dirt where they meet the wide boards
This style saved my cousin’s deck renovation. Her old railing was ugly but structurally sound. Instead of tearing everything out, she screwed wide boards over the existing framework, then added battens over the seams. The whole project cost under two hundred dollars and took one weekend.
11. Notched Top Rail for Drink and Plate Resting
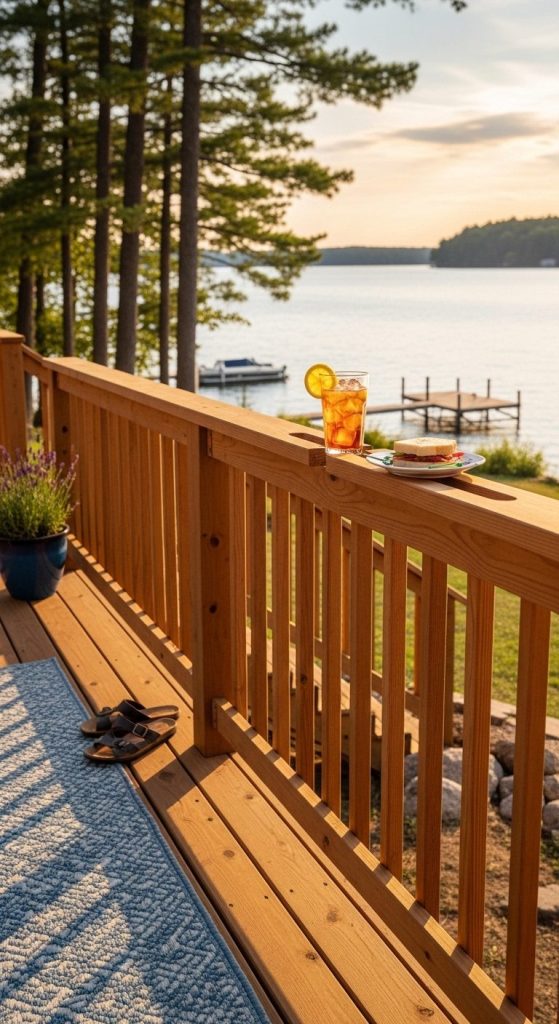
Why should your railing just sit there looking pretty when it could also hold your iced tea? A notched top rail has shallow cutouts every few feet where the wood dips down slightly. These notches are perfect for resting plates, cups, or even a book while you read outside. You’re essentially building a continuous outdoor table into your railing.
Pros:
- Adds genuine functional value to every gathering
- Notches prevent drinks from sliding off sloped railings
- Simple design feature that guests will comment on constantly
Cons:
- Notches weaken the top rail slightly compared to solid wood
- Dust and rain collect in the cutouts over time
Use a jigsaw to cut gentle curves into the top of a 2×6, then sand everything smooth. Space your notches about two feet apart. Seal the cut edges thoroughly because exposed end grain soaks up water faster than flat surfaces. Your future self will thank you every time you host a party.
12. Lattice Top Section with Solid Lower Railing
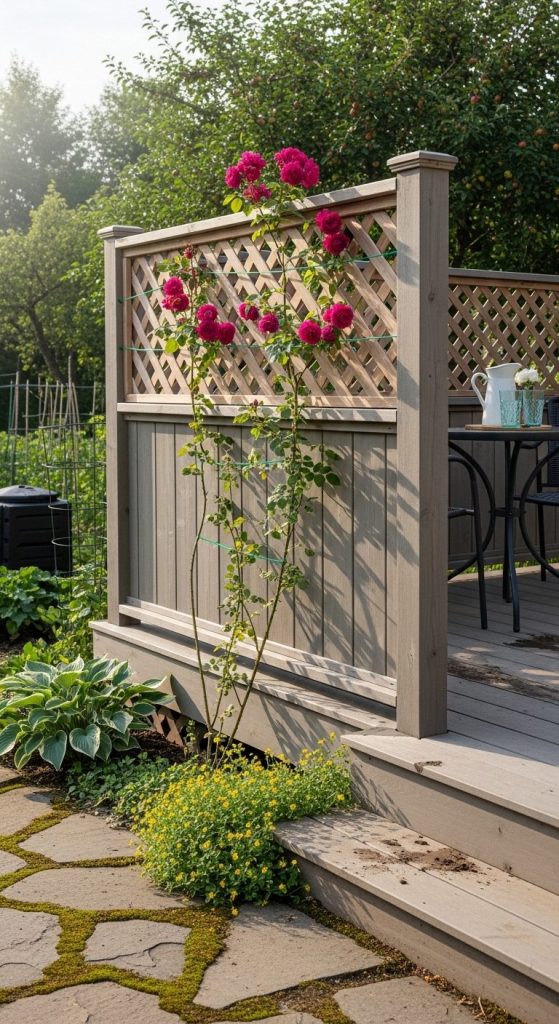
Here’s a solution for people who want some privacy but not complete isolation. Build a solid lower railing about two feet tall, then add a lattice section above it. The solid part blocks views when you’re sitting down. The lattice lets light and air through while still creating a sense of enclosure. Paint the whole thing one color for a cohesive look.
Pros:
- Provides sitting privacy without feeling like a prison yard
- Lattice supports climbing plants like roses or jasmine
- Lumber yard lattice panels are inexpensive and easy to install
Pros (continued):
- Bottom section adds strength that lattice alone lacks
Cons:
- Lattice can look cheap if you buy the thinnest option available
- Cleaning between lattice diamonds is genuinely annoying
A landscaping expert once told me that lattice railings with climbing vines are the fastest way to make a new deck feel established. The vines grow quickly, softening all those straight lines. Within two summers, your railing will look like it’s been there for decades.
13. Reclaimed Pallet Wood Railing
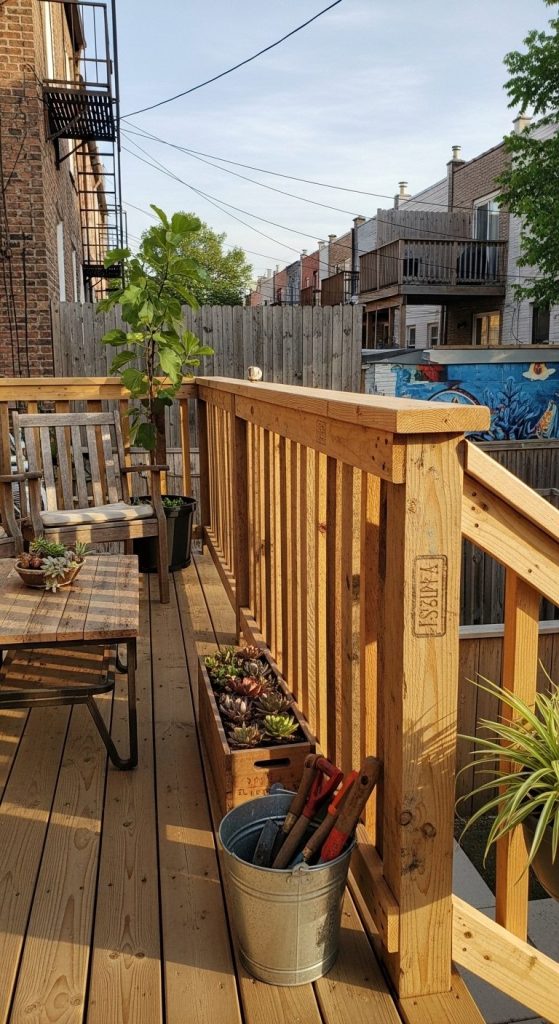
Before you roll your eyes, hear me out. Not all pallet wood is garbage. Heat-treated pallets marked with HT can be disassembled into surprisingly nice lumber. The wood often has interesting grain patterns and subtle color variations. When arranged as a railing with careful spacing, the result has a rustic, slightly industrial feel that costs almost nothing.
Pros:
- Extremely low cost if you find free pallets locally
- Environmentally friendly way to keep wood out of landfills
- Each pallet gives you varied wood tones naturally
Cons:
- Finding enough matching pallets takes time and hunting
- Pallet wood varies in thickness, requiring extra planing or shimming
Stick to pallets stamped with HT only. Avoid anything marked MB, which means methyl bromide was used as a fumigant. You don’t want those chemicals near your family. Also, invest in a pallet breaker tool. Trying to dismantle pallets with a crowbar will make you miserable.
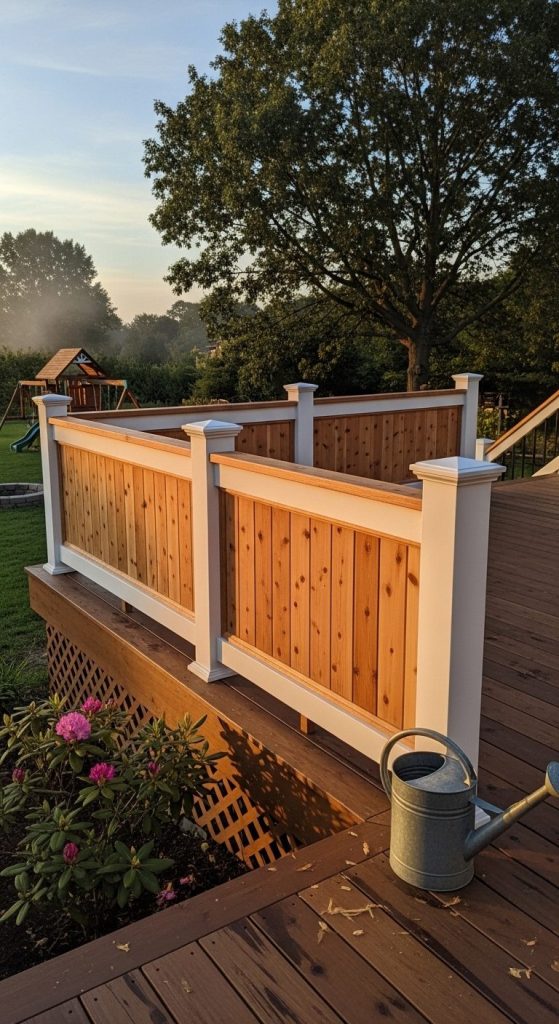
14. Two-Tone Railing with Dark Bottom and Light Top
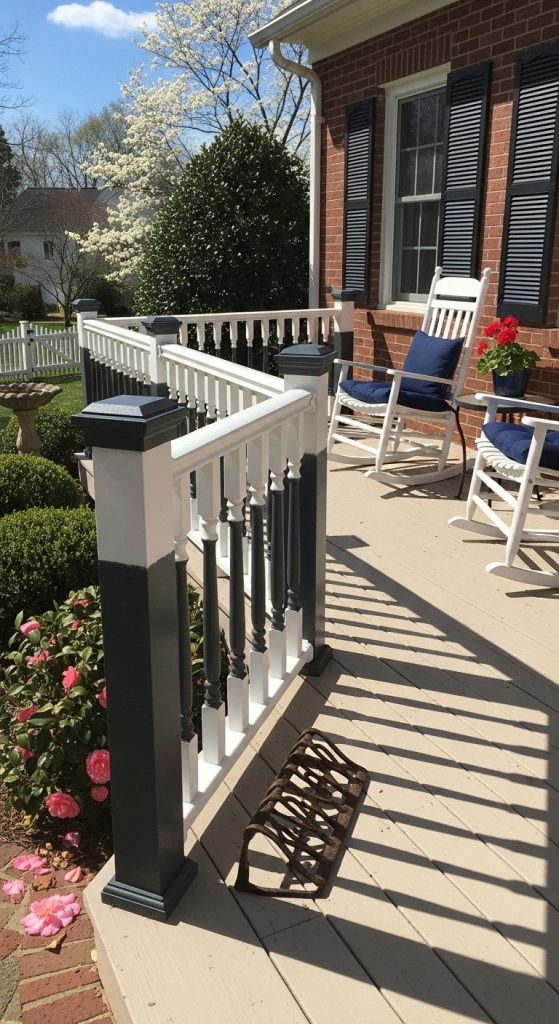
Painting your entire railing one color is fine. Painting it two colors is smart. Use a dark color like charcoal or navy on the lower section and balusters, then switch to white or cream on the top rail and post caps. The dark bottom visually grounds the railing and hides dirt. The light top draws the eye upward and makes the deck feel taller.
Pros:
- Dark lower section hides splashes, mud, and scuff marks
- Two-tone look adds perceived value without extra materials
- Easier to repaint sections separately when they fade differently
Cons:
- More painting time because you’re working with two colors
- Masking between colors takes patience for clean lines
According to paint manufacturers, two-tone railings are trending because they solve a real problem. Dark colors show dust. Light colors show dirt. Using both gives you the best of each. The visual break also makes the railing look more intentional and custom.
15. Glass Panel Infill with Wood Frame
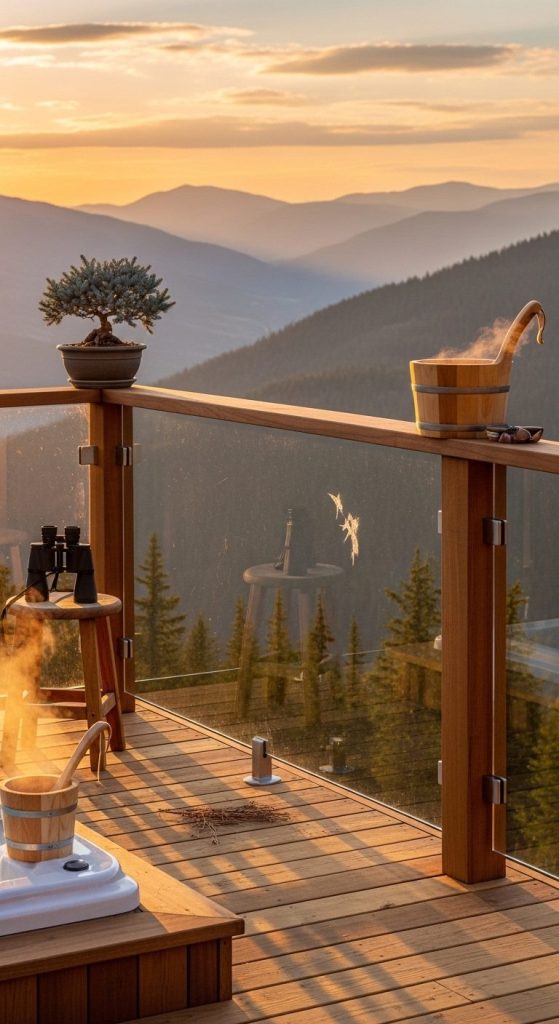
I almost didn’t include this because glass sounds expensive and fragile. But hear me out. Tempered glass panels set into a wood frame give you a completely unobstructed view while still meeting building codes. The wood frame keeps everything warm and residential, unlike the all-glass systems that feel like office buildings. This is for views you genuinely want to see.
Pros:
- Zero visual obstruction for mountain, lake, or ocean views
- Glass is actually very strong when properly installed with tempered safety glass
- Wood frame can match your existing deck color perfectly
Cons:
- Glass panels cost more than any other infill material
- Shows every water spot, fingerprint, and bird contribution
A deck contractor told me that glass railings have dropped in price significantly over the last five years. They’re still not cheap, but they’re no longer reserved for luxury homes only. If your deck overlooks something beautiful, this might be worth the investment. Just budget for squeegees too.
Your Next Step Toward Better Deck Railings
I’ve shown you fifteen completely different directions, from budget-friendly pallet wood to view-maximizing glass panels. Some of these ideas take a weekend. Some take serious planning. But every single one will change how you feel about your deck.
Here’s my honest advice. Pick the one idea that made you stop scrolling. The one where you thought, I could actually do that. Start there. Don’t overthink it. Don’t let perfect be the enemy of done.
Your deck should feel like an extension of your home, not an afterthought. And your wood deck railing ideas don’t have to be complicated to be good. Sometimes the simplest change makes the biggest difference. Now go make your deck something you actually want to show off.

William Martin is a passionate bowler who spends most of his weekends playing the sport. With years of intense experience under his belt, William decided to share his knowledge by creating BOWLING OCEAN. Join me on this journey to explore the world of bowling and discover the tips and tricks to becoming a pro.