How to Practice Bowling at Home? Bowl Like a Pro
At the start of your bowling expenditure, you need a lot of practice to get accuracy in taking pins down. It seems easy to see as a third person, just throwing the ball down the alley. Trying it on your own will make you feel how challenging the game is in reality. Bowling alleys are expensive; you can’t go there for practice daily.
Well, there is good news, you don’t have to spend money, you can practice at home too. Wait, but how to practice bowling at home without setup? It is easier than you think; you only need a dedicated space for practice and a few tips on getting it right.
Let’s go through some tips from the expert to practice bowling at home and boost your confidence by leveling up your skill.
How to Practice Bowling: Home Tips?
It would help if you started practicing more before taking your bowling skills to the next level. Every time you don’t need to rush to the bowling arena to do so. Dedicate a Space
Choose a corner of your room to dedicate to your bowling practice without any disturbances. Clear out the space, ensuring you have enough room to practice all your movements and ball roll; it should be at least the length of a bowling alley.
The space can be in your garage, basement, or backside hallway where passing is less. Learn how to build a bowling lane in your basement and take your practice space one step closer to perfection.
1. Buy a Bowling Set
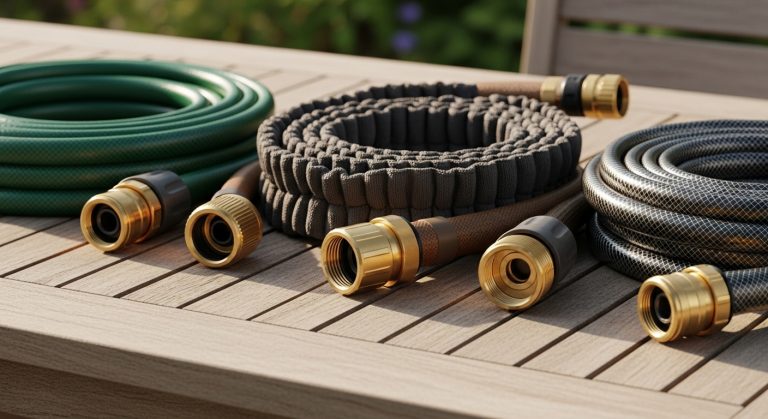
Equipment matters a lot to give you the right practice experience. Even though there are many ways to DIY your balls, using plastic balls and pins out of bottles, however, it will not give you an original feel. Various factors like ball weight, speed, and momentum would be different from the real one.
Investing in a bowling set is important to practice with perfect equipment. It will help you carry and launch techniques with a real feel and weight.
2. Work on Stance and Approach
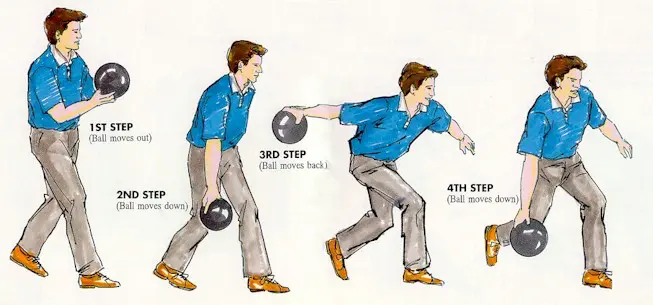
An important thing to start practicing is your stance on the bowling lane. The perfect stance is standing your feet shoulder-width apart, perpendicular to the target line. Keep your posture relaxed and shoulders parallel to the foul line.
Focus on your footwork and shoulder action, making it smooth but consistent. Apply an accurate amount of force so your ball is fast enough and steady rolling down the lane.
Read also: 4 Step Bowling Approach – Difference Between 4 Vs. 5 Step Approach
3. Target Specific Areas
If you are new to bowling practice and unaware of the positions and throw styles, read about them and mark them. You can use different color code tapes to mark positions like standing, throwing, and bending on the ground.
It will help you know where your feet should align while delivering the ball down the alley. Also, work on properly holding a bowling ball; it is a first step before moving on to throwing shots.
4. Experiment with Different Throwing Techniques
There are different ball-throwing techniques that you can try out, and pick the best one that works well for you. Not every bowling technique is for everyone; you can be pro in one but weak in another. Experiment with all of them to see which works best with your wrist strength and movement.
| Technique | Explanation |
| Straight Ball | A basic technique where the ball is rolled straight towards the pins without any spin. |
| Hook Ball | A technique where the ball is released with a spin, causing it to curve towards the pins. |
| Backup Ball | Similar to the hook ball, but with the spin in the opposite direction, resulting in a reverse curve. |
| Lofting | Releasing the ball further down the lane allows it to travel over the oil pattern for a better grip on the dry surface. |
| Power Shot | A forceful throw with increased speed and power to maximize pin impact. |
| Fingertip Grip | Holding the ball with the fingertips instead of the traditional conventional grip for better control and increased revolutions. |
| Cranker | A style characterized by a high rev rate and strong hook, generating significant pin action. |
| Tweener | Combining elements of straight and hook shots, ideal for targeting a specific pin or pin combination. |
| Sparing | Using a different technique or angle to pick up specific spare combinations effectively. |
| Full Roller | A technique where the ball rolls directly on the thumb and fingers without touching the lane surface. |
5. Strengthen your Core and Legs
Bowling requires a lot of stamina from your core muscles and leg muscles. You have to throw and maintain balance at the same time. Make a specialized workout routine to strengthen your core muscles with planks, squats, and lounges. A stronger core and legs will improve your stability and power during the approach.
Conclusion
After learning tips on how to practice bowling at home, you need to take a start with devoted space in your house. Invest in good bowling equipment, try different throwing techniques, and focus on your stance and accuracy. Lastly, strengthen your core by exercising to maintain balance and power in your posture.
Home practice sessions will allow you to work on yourself without interruptions, and you will execute perfect shots by the end.
FAQs

William Martin is a passionate bowler who spends most of his weekends playing the sport. With years of intense experience under his belt, William decided to share his knowledge by creating BOWLING OCEAN. Join me on this journey to explore the world of bowling and discover the tips and tricks to becoming a pro.